Working with terminology
Find below the procedures for the following tasks:
Setting
copy term option
The copy term option copies the source segment to the target segment.
To set copy term option:
Open
Wordfast Pro 3 and click  .
.
The TXML perspective appears.
Click Terminology
> New/Select Glossary > Translations > Terminology.
The Preferences (Filtered) Terminology dialog box appears.
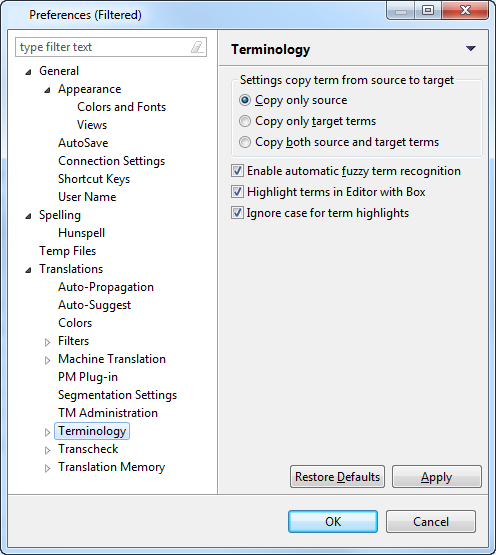
Select one of the following
copy term options:
Select Enable
automatic fuzzy term recognition checkbox to clear it, if you
do not want to see fuzzy matches from the glossary highlighted.
Select Highlight
terms in Editor with Box to clear it, if you do not want to
enable highlighting of terms with a box in the TXML Editor.
Select Ignore case for term highlights
to clear it, if you do not want to ignore case when highlighting
terms.
Click Apply
and OK.
Highlighting terms
To highlight terms:
Click Terminology
> New/Select Glossary > Translations > Terminology.
The Preferences (Filtered) Terminology dialog box appears.
Select Highlight
terms in Editor with Box checkbox to highlight terms in the
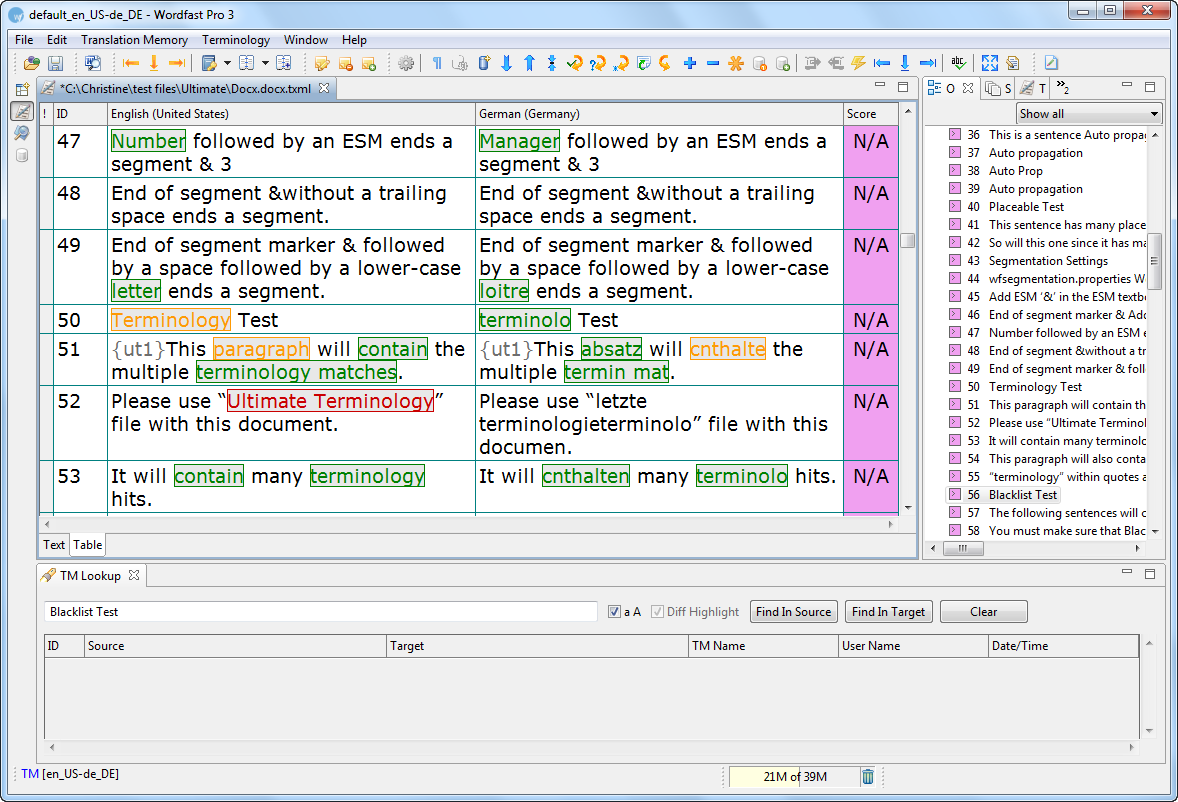
TXML editor in different colors with a box as explained below.
Green |
100% match in source and target |
Orange |
(fuzzy
in source or target) |
Red |
match
in source but no match in target |
Click Apply
and OK.
The terms are highlighted as shown in the screenshot below.
Under the Terminology menu click Run/Stop
Term Highlighting (Ctrl+F5) to highlight terms and to
turn off highlighting for all segments. The terms will still be highlighted
for the currently selected segment.
Auto-propagating terms
To auto-propagate terms:
Follow the steps to open a
file from Opening a file.
The file appears in the Translation window. If a term from the glossary
exists in the source segment, it will appear in red
by default.
Note: Ensure that a glossary is imported and selected for the
project. For more information, refer to Importing
a glossary.
Select Edit
> Copy Source or click  or press Alt+Insert, to copy
the text from the source segment into the target segment.
The glossary term translation is auto propagated as shown in the screenshot
below.
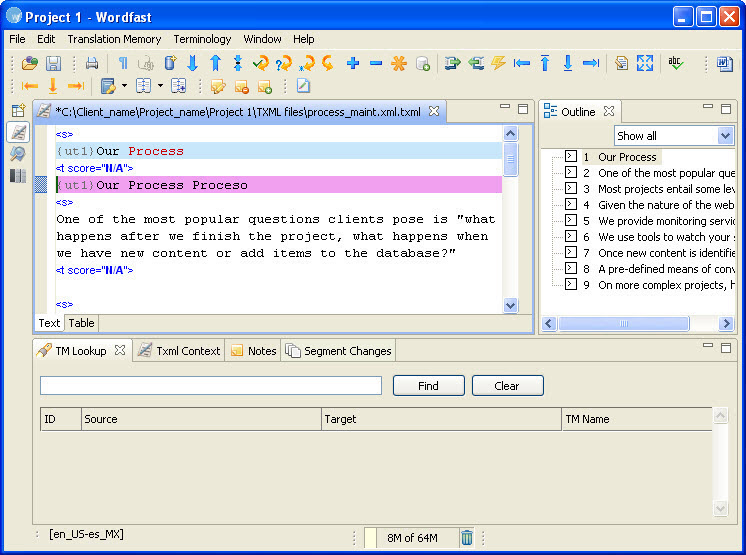
Note: The term 'Process' is followed by its translation 'Proceso'.
Using
a term wildcard
To add and use a term wildcard:
Follow the steps to open a
file from Opening a file.
The file appears in the Translation window. If a term from the glossary
exists in the source segment, it will appear in red
by default.
Click Terminology
> Edit.
Select the glossary that you
want to edit.
The glossary appears.
Double-click the entry you
want to modify.
The Edit term dialog box appears.
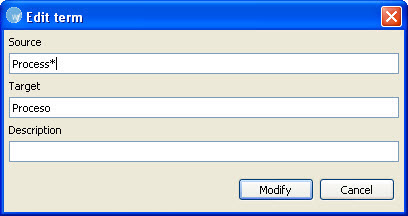
Type a '*' after the term
to populate all variations of the selected term. For example, the
wildcard term 'Process*' will populate the target 'Proceso' for all
term variations such as 'Processes', 'Processing', and so on.
Click Modify.
The terminology wildcard is activated.
Leveraging
a glossary
To leverage a glossary:
Follow the steps to open a
file from Opening a file.
The file appears in the Translation window. If a term from the glossary
exists in the source segment, it will appear in red
by default.

Select Terminology
> Previous Term / Next Term or click  or
or  or press Ctrl+Alt+8
/ Ctrl+Alt+9.
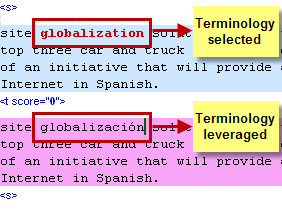
The term is highlighted and selected.
In the target segment, place
the cursor at the location where you want the translated term to appear.
Select Terminology
> Copy Term or click  or press Ctrl+Alt+0.
The translated term appears in the target segment.
Adding
terms
Terms can be added to glossaries, if permitted. If a
selected glossary is read-only, you will be prompted to set up a new glossary.

There are two ways to add terms to a local or remote
glossary:
Click Terminology
> Add Term or click  .
.
The Add to glossary dialog box appears.
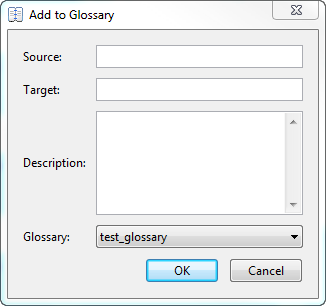
Enter the term in the Source
or Target field.
Enter a Description
of the term if desired.
Select the glossary to which
you want to add the term.
Click OK.
OR
Select text from the source
or target segment. Press Ctrl+Alt+T,
or click Terminology > Add Term
or click  .
.
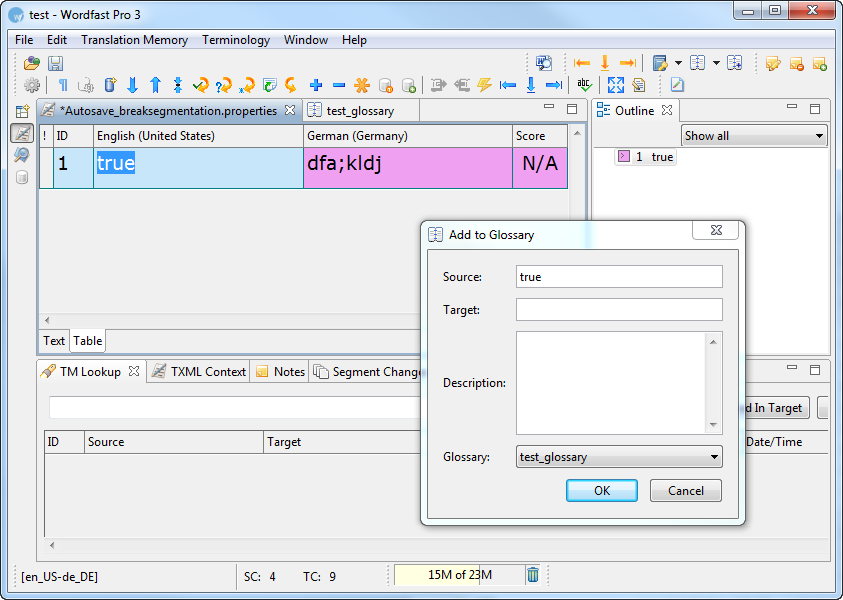
The Add to Glossary dialog
box appears. The selected text appears in the source or target field,
depending on whether it is in the source or target segment. In the
example below, the selected text appears in the source field.
Enter a Description
of the term if desired.
Select the glossary to which
you want to add the term.
Click OK.
OR
To continue and add text to
the target field, keep the Add to
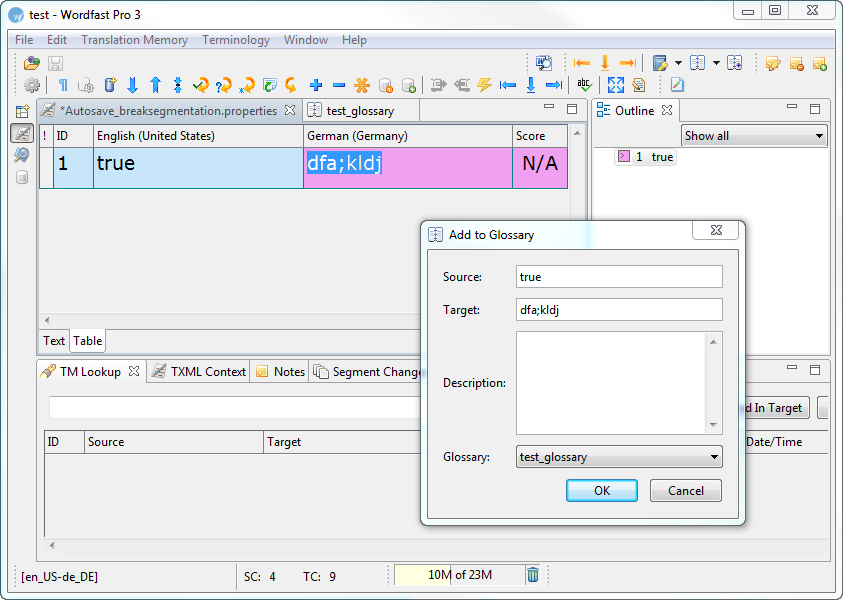
Glossary dialog box open. Select text from the target segment.
Press Ctrl+Alt+T, or click Terminology
> Add Term or click  .The
selected text appears in the target field.
Enter a Description
of the term if desired.
Select the glossary to which
you want to add the term.
Click OK.
The new term is added.
Alternatively,
Click Terminology
> Edit or click  .
.
Select the glossary list to
which you want to add terms.
The glossary list appears.
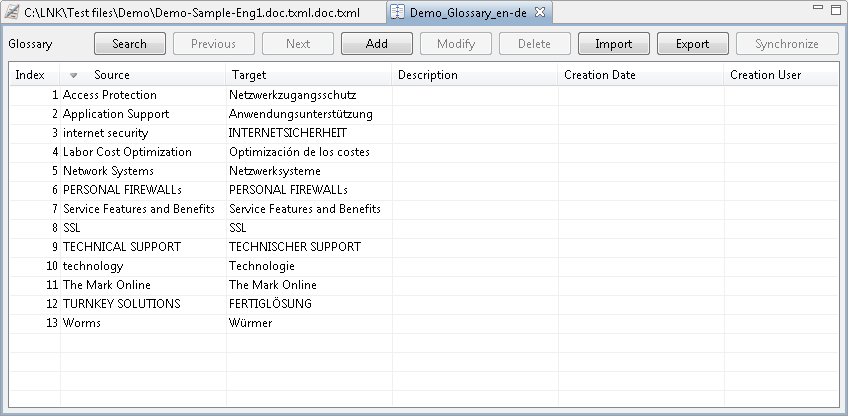
Note: To expand or shrink
a column, point to the right edge of the column's header with
the mouse.
A two-directional arrow appears.

Drag the arrow to the right to shrink the column.
Drag the arrow to the left to shrink the column.
Click  .
.
The Add term dialog box appears.
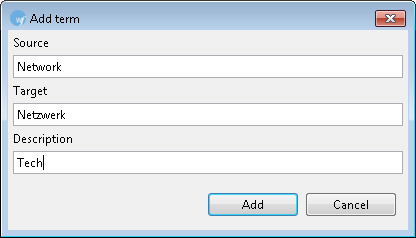
Enter Source,
Target, and Description
of the term.
Note: If you are adding a term to a remote glossary, the Description
field will not be available.
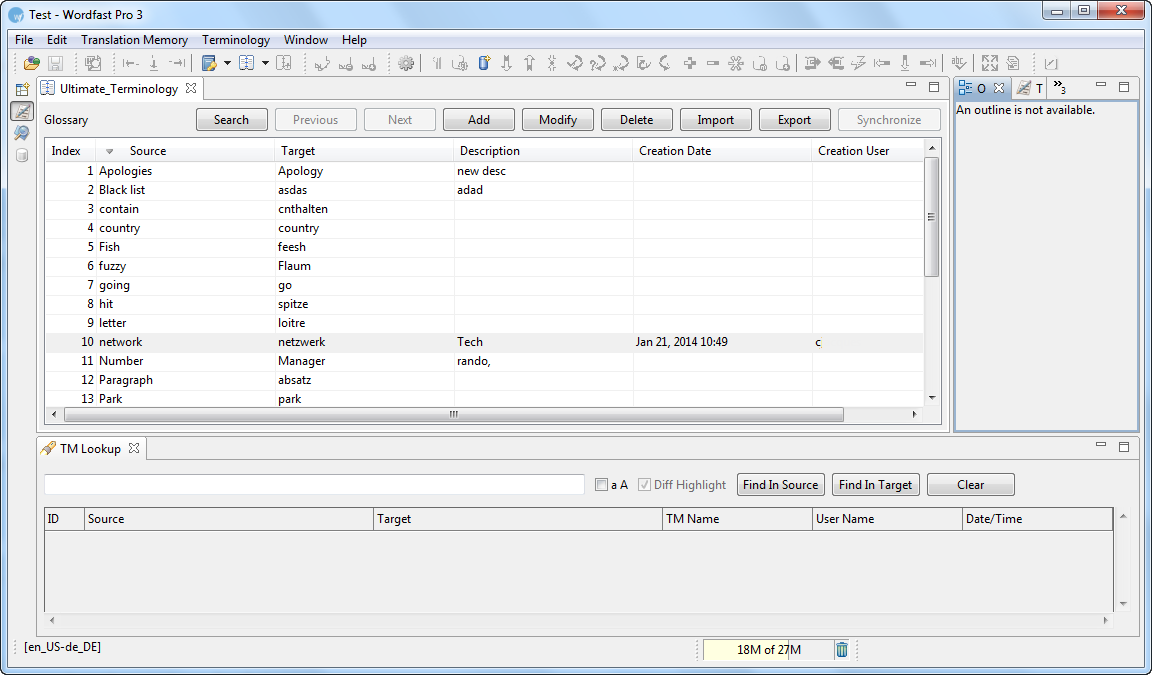
Click Add.
The new term is added.
Editing
terms
To edit terms:
Click Terminology
> Edit or click  or Ctrl+Alt+Enter.
Select the glossary list that
you want to edit.
The glossary list appears.

Note: To expand or shrink
a column, point to the right edge of the column's header with
the mouse.
A two-directional arrow appears.

Drag the arrow to the right to shrink the column.
Drag the arrow to the left to shrink the column.
Double-click the term you
want to modify.
OR
Select a term and click  .
.
OR
Right-click a term. The terminology editor submenu appears:

Click Modify.
The Edit term dialog box appears.
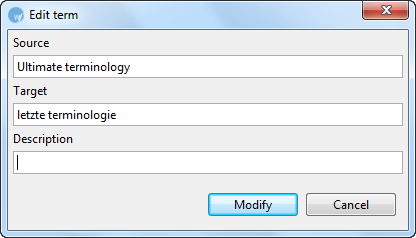
Enter the necessary changes
and click Modify.
The modified term appears in the glossary.
Copy a term
Click Terminology
> Edit or click  or press Ctrl+Alt+Enter.
Select the glossary list that
you want to edit.
The glossary list appears.

Right-click a term. The terminology
editor submenu appears:

Click Copy.
The term is copied from the Terminology Editor.
Adding
a blacklist
A blacklist includes words or phrases that should not
be used in the target segment.
To add a blacklist:
Click Edit
> Preferences > Terminology > Blacklist.
The Blacklist dialog box appears.
Click Create,
to create a new blacklist or Add, to add an existing blacklist.
Note: the blacklist must be a tab-delimited file.
Browse and select the location
of the new blacklist or existing blacklist.
Type a symbolic name and select
the language code of the blacklist.
Click OK.
The newly created or selected blacklist appears in the Blacklist List.
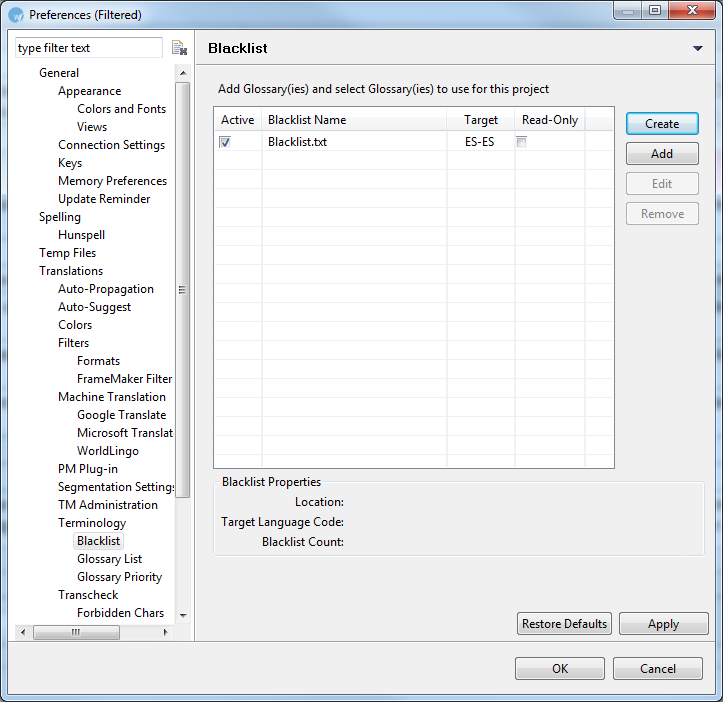
Select Selected
check box to use the blacklist during translation.
Select Read
only check box, if you do not want to update the blacklist.
(Optional)
Click OK.
A new or existing blacklist is created or opened for the project.
Editing
blacklist
To edit an existing blacklist:
Open Wordfast Pro 3 and click
 .
.
The TXML perspective appears.
Click the Edit blacklist icon
and select the blacklist as shown in the screenshot below.

The Blacklist appears as a separate tab.
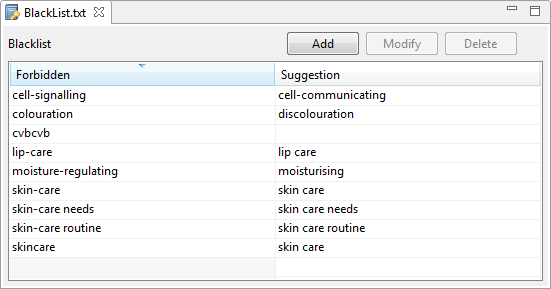
Note: To expand or shrink
a column, point to the right edge of the column's header with
the mouse.
A two-directional arrow appears.

Drag the arrow to the right to shrink the column.
Drag the arrow to the left to shrink the column.
To add a term to the blacklist,
click Add.
The Add Term dialog box appears.
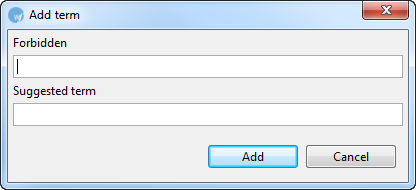
Enter the Forbidden and Suggested
term.
Click Add.
The forbidden term and suggestion appears in the blacklist.
To modify a term from the
blacklist, select the term and click Modify.
The Modify Term dialog box appears.
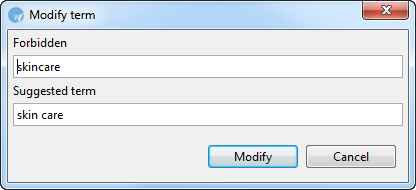
Edit the Forbidden and Suggested
term and click Modify.
To delete a term from the
blacklist, select the term and click Remove.
A warning message appears.

Click Yes
to delete the blacklisted term.
Using
Wordfast Pro and Wordfast Classic glossaries
Wordfast Professional (WF Pro) and Wordfast Classic (WFC) can share
project glossaries. The WF Pro
glossary .txt file is located with your glossary files. WFC must connect
to this text glossary file. Once the
WF Pro glossary is created, WF Pro must be closed to permit WFC to connect
to the WF Pro glossary.
The example below shows how a glossary is shared between Wordfast Pro
and Wordfast Classic.
Open a project in Wordfast
Pro
Click Terminology.
Click New/Select
Glossary or press Alt+N.
The Glossary List appears.
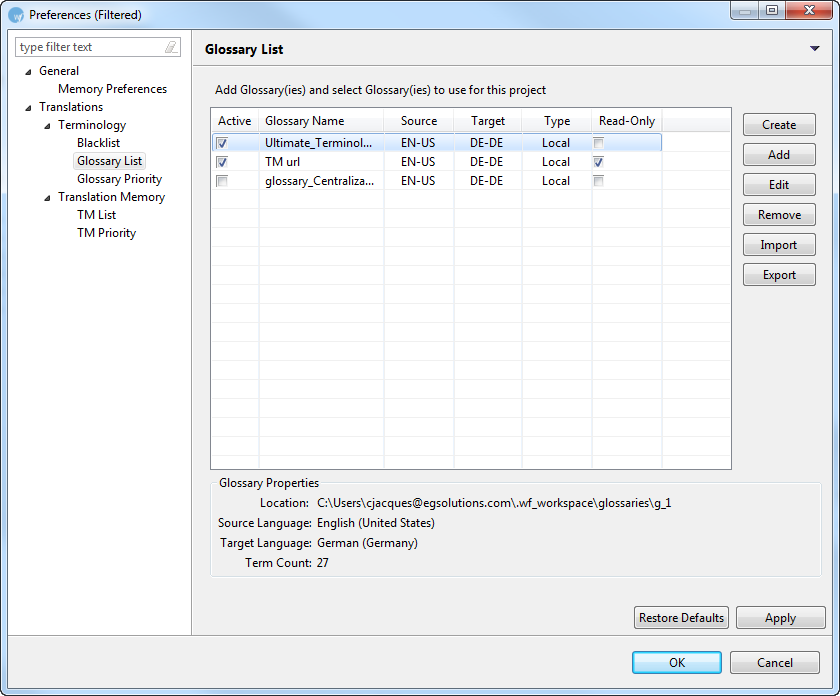
Click Import.
Locate the glossary to be
shared.
Close Wordfast Pro. Failure
to close Wordfast Pro leaves the glossary file locked, and it
cannot be opened or modified.
Activate Wordfast Classic
in the Word document by clicking the Wordfast Classic button, or pressing
Ctrl+Alt+W.
Click the Wordfast Classic
button.
Add the <glossary_name>.txt
file located in Wordfast Pro above.
Select the glossary, and click
Reorganize.
Select the terms to be added,
and press Ctrl+Alt+T to add terms to the glossary in Wordfast Classic.
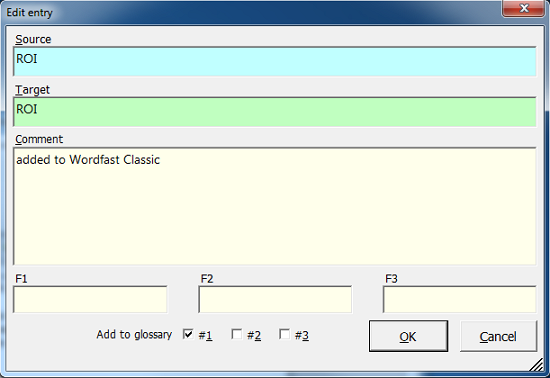
The Edit Entry dialog box appears.
Enter the source term, or
the target term, and an optional comment.
An example is shown below.
Click OK.
Finish working
in Wordfast Classic, and close the Word document.
Open Terminology in Wordfast
Pro.
Open the glossary.
The added term appears in the glossary.
![]() .
.


