Importing and exporting glossaries
A glossary is a list of source terms and their preferred translations.
For example, a terminology list could include information as follows:
Source |
Target |
translation memory |
mémoire
de traduction |
translation unit |
unité
de traduction |
data transfer rate |
taux
de transfert de données |
International Translators Federation |
Fédération
Internationale des Traducteurs |
The glossary is stored as a tab-delimited list of source and target
terms on your computer or a common server. To use a glossary, you need
to import it into Wordfast Pro 3. After completing a translation project,
you also have an option to add new terms and export the glossary to your
computer or a common server. Find below the procedures for the following
tasks:
Importing
a glossary
To import a glossary:
Open Wordfast Pro 3 and click
 .
.
The TXML perspective appears.
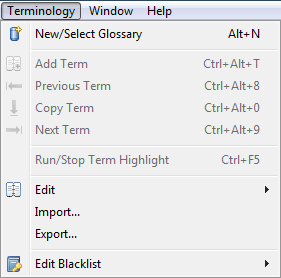
Click Terminology
> Import.
The Import Glossary dialog box appears.
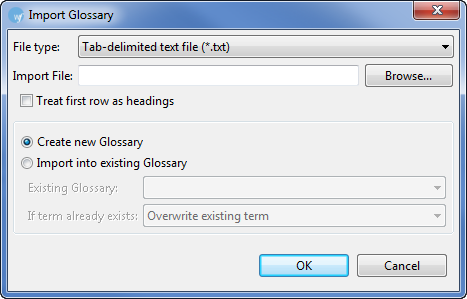
Choose File
type. You have two options:
Enter or browse for the glossary.
Select checkbox to ensure
that the first row of the glossary is viewed as headings.
Next, you have two options:
Creating a new glossary
To create a new glossary:
Follow steps 1 to 4 from Importing a glossary.
Click Create
new glossary.
Click OK.
The Create Glossary dialog box appears. The Symbolic Name will be populated
based on the imported glossary file name. The Source and Target Language
Code will be populated based on the language of the currently open
project.
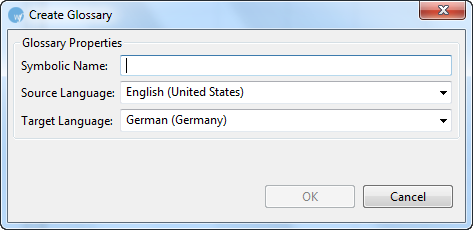
If required, enter a different
Symbolic name, Source
Language Code, and Target
Language Code.
Click OK.
The terms from the local terminology list are imported and a new terminology
file is created.
Import into existing glossary
To import a new glossary into an existing glossary:
Follow steps 1 to 4 from Importing a glossary.
Select Import
into existing Glossary.
The Import into existing Glossary option is activated.
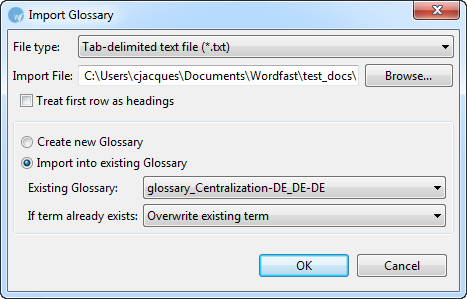
Select the Existing
Glossary for the open project.
In the If
term already exists prompt, select an action to
perform if there is an overlap between the existing and new terminology
list.
Click OK.
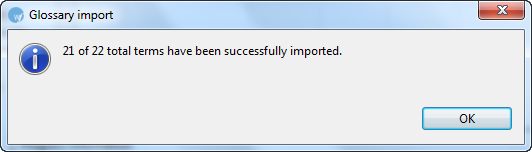
The Glossary import report dialog box appears. This describes the number
of terms that will be imported.
Click OK.
The new glossary is imported and the following message will appear:
Adding
a remote glossary
A glossary can be added using the following:
Term Manager
To add a glossary from Term Manager:
Open Wordfast Pro 3 and click .
The TXML perspective appears.
Open the Terminology
menu and click New/Select Glossary.
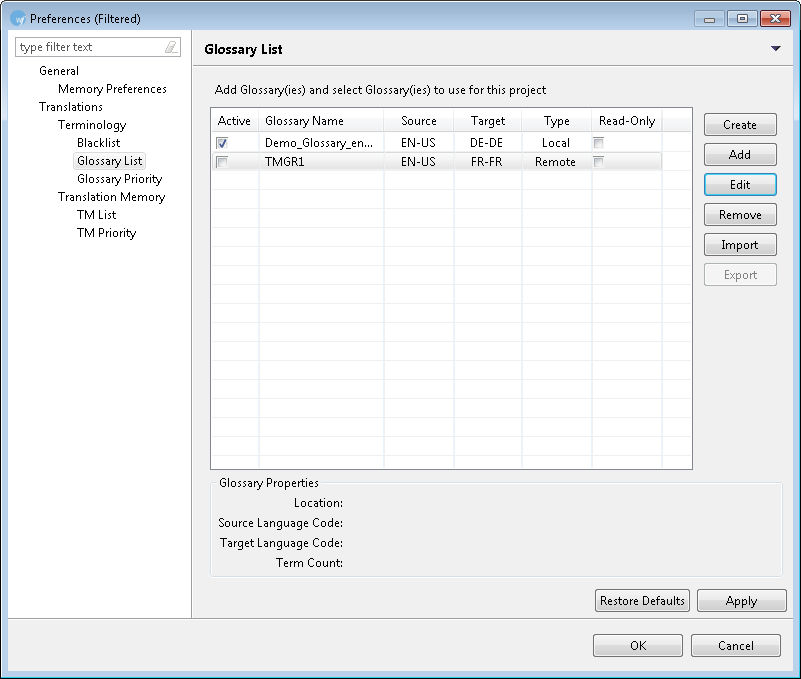
The Preferences - Glossary List appears.
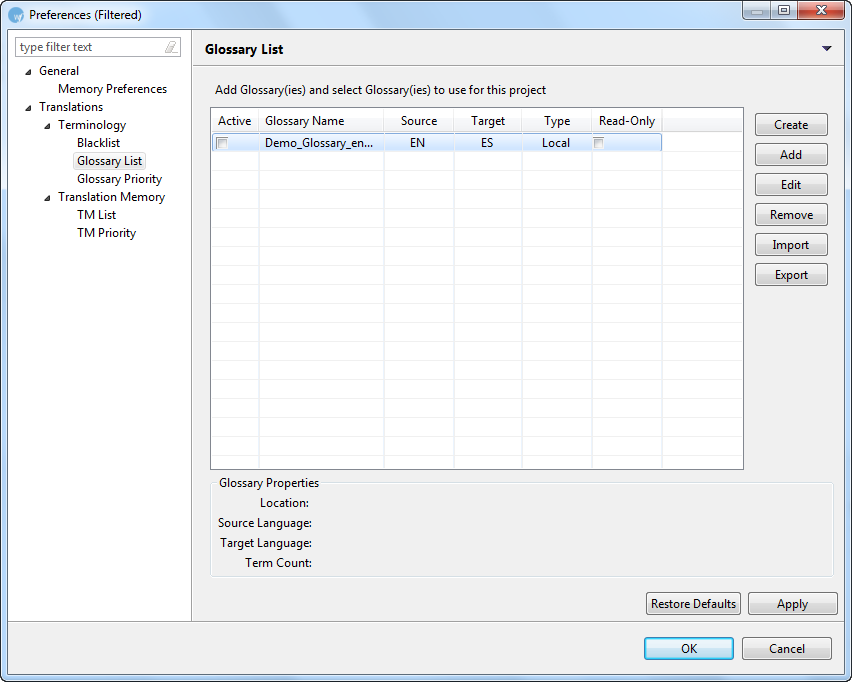
Click Add.
The Add Glossary dialog box appears.
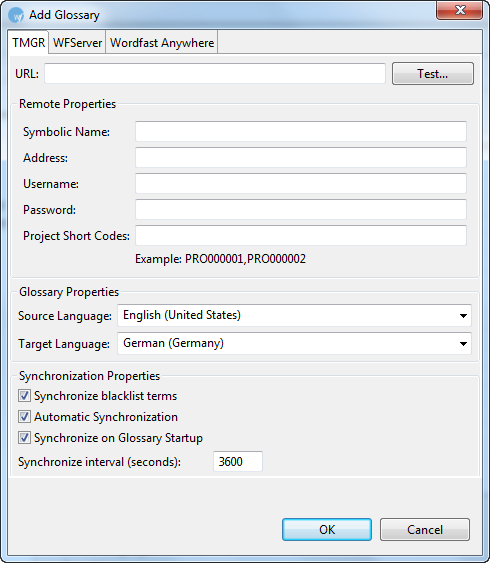
Give the glossary a Symbolic
Name and assign a Source
and Target Language Code.
Enter the URL
of the Term Manager instance.
The remote TMGR information is populated automatically, when the username,
password and Project Short Code are contained within the URL string.
Alternatively, enter each of the remote TM properties.
Option |
Description |
URL |
Enter
the Term Manager URL. |
Username |
Enter
the username to access Term Manager. |
Password |
Enter
the corresponding password for the username. |
Project Short Codes |
Enter
the Term Manager project shortcodes. If multiple Project Short
Codes are needed, separate them with a comma. |
Select the Synchronization
Properties.
Option |
Description |
Synchronize
blacklist terms: |
synchronize
blacklisted terms in Term Manager with Wordfast blacklist.
Selected by default. |
Automatic
Synchronization |
enable
automatic synchronization with GlobalLink® Term Manager (TMGR)
whenever a term is added or deleted. Selected by default. |
Synchronize
on Glossary Startup: |
enable
Term Manager synchronization when the Glossary dialog box
is opened.
Note: Wordfast can connect to Term Manager versions running
4.3.1 or above. Version 4.3.1 supports read access only, and
read/write access is supported as of Version 4.5. Selected
by default. |
Synchronize
interval (seconds): |
enter
the interval for Term Manager synchronization. |
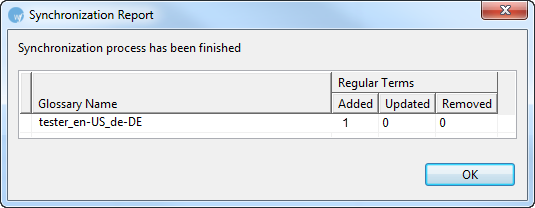
Note: If the remote
glossary was not set up to be synchronized, it can be synchronized from
the glossary. Click Synchronize.
When the glossary synchronization is complete, a confirmation message appears.
A report appears showing the number of terms added, updated or removed.
Click Test...
to test the Term Manager connection status.
The following message appears when Wordfast successfully connects to
the Term Manager instance.
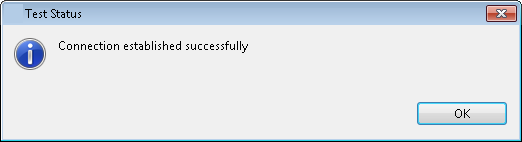
Click OK.
Click OK on
the Add Glossary dialog box.
The new glossary is added to the glossary list.
Note: Wordfast can connect
to Term Manager versions running 4.3.1 or above. Version 4.3.1 supports
read access only, and read/write access is supported as of Version
4.5.
WF Server
To add a glossary from WF Server:
Open Wordfast Pro 3 and click .
The TXML perspective appears.
Open the Terminology
menu and click New/Select Glossary.
The Preferences - Glossary List appears.
Click Add.
The Add Glossary dialog box appears.
Click the WFServer tab.
The WFServer details appear.
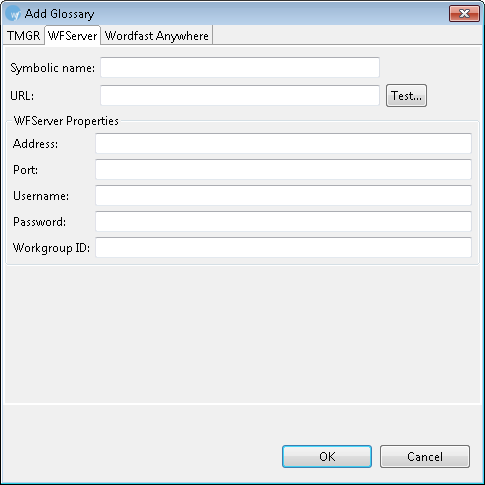
Give the glossary a Symbolic
Name.
Enter the URL
of the WFServer to autopopulate the WF Server properties
OR
Enter the Address, Port, Username, and Password for the WFServer to
autopopulate the URL.
Enter the Workgroup ID.
Click Test...
to test the WFServer connection status.
The following message appears when Wordfast successfully connects to
the WFServer.
Click OK on
the Add Glossary dialog box.
The new glossary is added to the glossary list.
Wordfast Anywhere
To add a glossary from Wordfast
Anywhere (WFA):
Open Wordfast Pro 3 and click .
The TXML perspective appears.
Open the Terminology
menu and click New/Select Glossary.
The Preferences - Glossary List appears.
Click Add.
The Add Glossary dialog box appears.
Click the Wordfast
Anywhere tab.
The Wordfast Anywhere details appear.
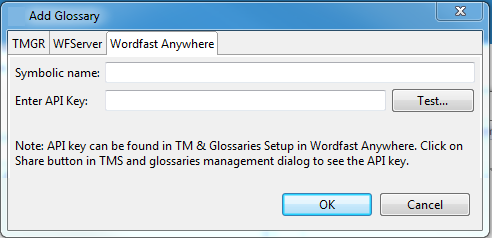
Give the glossary a Symbolic
Name.
Enter the API Key.
Click Test.
The following message appears when Wordfast successfully connects to
Wordfast Anywhere.
Click OK.
Click OK on
the Add Glossary dialog box.
The new glossary is added to the glossary list.
For more information, refer to the Sharing to Applications topic in
the Wordfast
Anywhere Manual.
Editing
a remote glossary
Open Wordfast Pro 3 and click .
The TXML perspective appears.
Open the Terminology menu and click Edit,
then select the appropriate glossary.
The glossary appears.
Click Search
to search through the glossary. Both Source and Target search options
are available.
Click Add
to add a term to the glossary.
Click Synchronization
to synchronize any added terms to the glossary.
Note: Wordfast can connect to
Term Manager versions running 4.3.1 or above. Version 4.3.1 supports read
access only, and read/write access is supported as of Version 4.5.
Exporting
a glossary
Local and remote glossaries can be exported, with the exception of Term
Manager glossaries. To export a glossary:
Open Wordfast Pro 3 and click
.
The TXML perspective appears.
Click Terminology
> Export.
OR
Select the glossary from the drop-down menu.

The glossary appears.
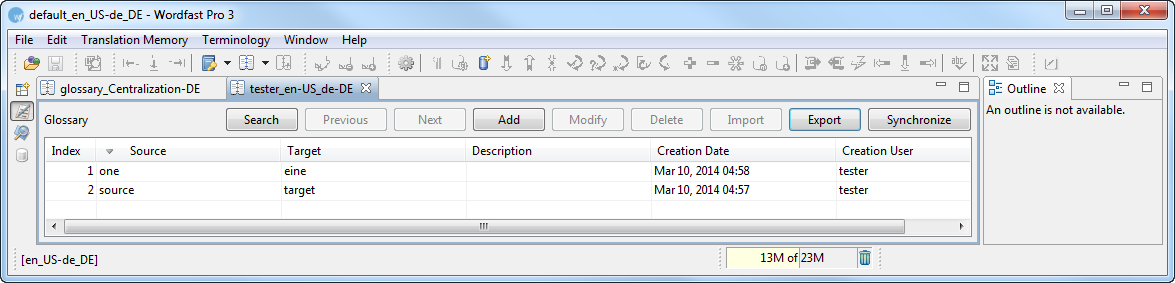
Click Export.
The Export Glossary dialog box appears.
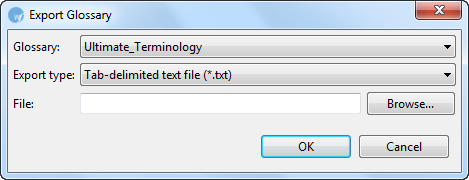
Select Glossary
name.
Select Export
type. You have two options:
Enter or browse the location
for the glossary.
Click OK.
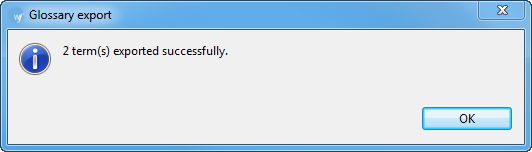
The glossary is exported and saved at the specified location.
Changing
Glossary Priority
Click on Glossary
Priority under Terminology.
The Terminology - Glossary Priority dialog box appears.
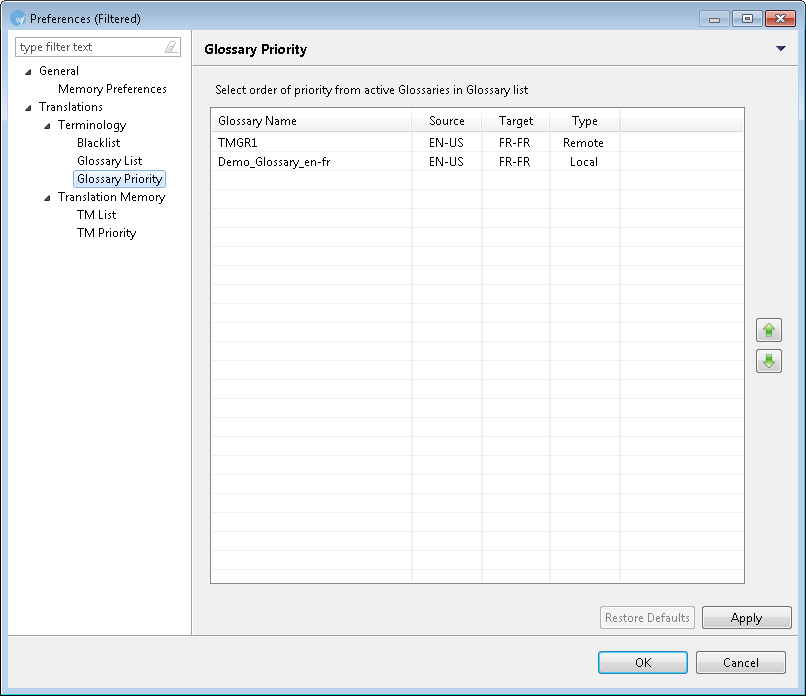
Click  or
or  to prioritize newly created or available
local and remote glossaries.
to prioritize newly created or available
local and remote glossaries.
Note: Prioritizing glossaries will ensure that the first glossary
in the list is leveraged first, followed by the remaining glossaries.