In Wordfast Pro, every translation begins with a project. Projects act as repositories for all related content, along with associated translation memories (TMs) and glossaries.
| Alert: You must create a project before you begin translation, unless you use the Open TXLF action. |
| Note: A project also requires file format filters to convert the source content into segments prior to beginning the translation process. |
To create a project:
- On the Projects tab, click Create Project.
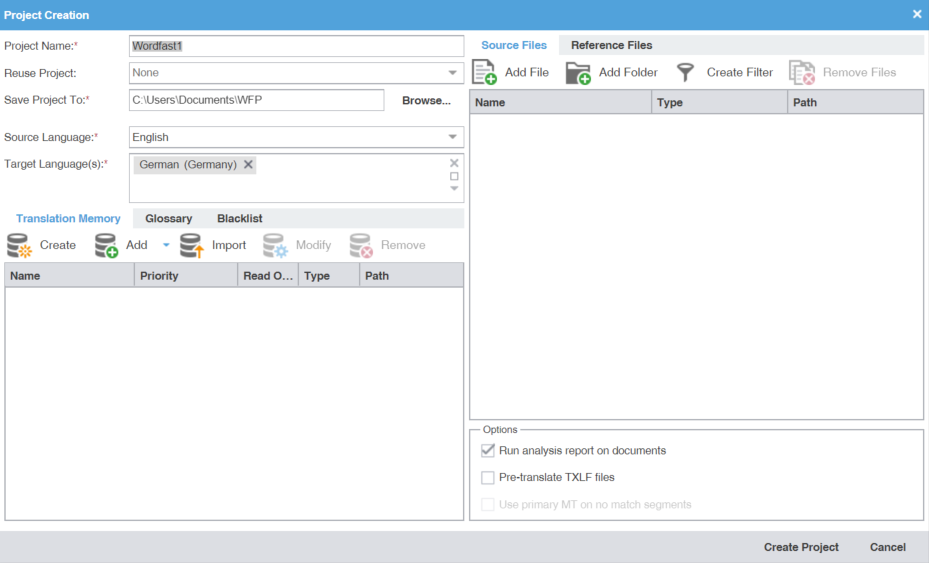
- On the Project Creation dialog, enter a project name.
- (Optional) If you want to reuse the profile of a previously created local project, select it from the Reuse Project drop-down list.
- Enter the Save Project To location or click Browse... to select the location for your project.
- Select Source Language and Target Language(s) from the drop-down lists.
- In the Editor pane, click the Translation Memory tab, if it is not already active.
- (Optional) Click Create to add a new local TM for your project.
- On the Create TM dialog, enter a unique name for the TM.
- Select a target language to create a language pair, then select the location for the TM on your local disk.
- Select either primary or secondary priority from the drop-down list to determine the TM you leverage first.
- (Optional) To prevent any edits to the TM, select Read-only.
- Click OK.
- (Optional) To add an existing TM to your project, click Add, then select a local, remote, or a project-specific TM from the drop-down menu.

Best Practice: To use a free online tool for work and production that integrates with Wordfast Pro, use Wordfast Anywhere (WFA) as your remote, unlimited, and private TM.
- Local — Select a location on your local disk.
- Add Remote — Enter the TM Server or WF Server or WFA Server details on the Connect to Remote TM dialog. Refer to Connect to a Remote TM.
- Add Project TMs — Enter the details on the Add Project TMs dialog by selecting the project.
- (Optional) To import an existing TM to your project, click Import.
- On the Import Translation Memory dialog, select the import File Type: TMX or WF TXT TM format from the File Type drop-down list.
- Click Browse to locate and select the project file that contains the TM that you want to import.
- Select either the Create a new TM or Import into existing TM option. Refer to Import a Local TM.
- If the TU already exists, select an overwrite option from the drop-down list.
- Select Clear before import if you want to ensure the import overwrites a clean TM.
- Click OK.
- (Optional) To edit an existing TM in your project, click Modify.
- (Optional) In the Editor pane, click the Glossary tab.
- (Optional) Click Create to add a new local glossary for your project.
- On the Create Glossary dialog, enter a unique name for the glossary.
- Select a target language from the drop-down list, then select the location for the glossary on your local disk.
- Select either primary or secondary priority from the drop-down list to determine the glossary you leverage first.
- If you want to prevent any edits to the glossary, select Read-only.
- Click OK.
- (Optional) To add an existing glossary to your project, click Add, then select a local, remote, or a project-specific glossary from the drop-down list.
- Local — Select a location on your local disk.
- Add Remote — Enter the TMGR Server or WF Server or WFA Server details on the Connect to Remote Glossary dialog. Refer to Connect to a Remote Glossary.
- Add Project Glossary — Enter the details on the Add Project Glossary dialog by selecting the project.
- (Optional) To import an existing glossary to your project, click Import.
- On the Import Glossary dialog, select the import File Type: TBX or Tab delimited.
- Click Browse to locate and select the project file that contains the glossaries that you want to import.
- To configure a glossary creation option, select either the Create a new glossary or Import into existing glossary. Refer to Import a Local Glossary.
- Select an overwrite option for preexisting terms.
- Select Clear before import if you want to ensure the import overwrites a clean glossary.
- Click OK.
- (Optional) In the Editor pane, click the Blacklist tab.
- (Optional) Click Create to create a new local blacklist for your project.
- (Optional) To add an existing blacklist to your project, click Add, then select a local or remote blacklist from the drop-down list.
- Local — Select a location on your local disk.
- Add Remote — Enter the details on the Connect to Remote Blacklist dialog. Refer to Connect to a Remote Blacklist.
- (Optional) To import an existing blacklist to your project, click Import.
- On the Import Blacklist dialog, select the import File Type: TXT.
- Click Browse to locate and select the project file that contains the blacklist that you want to import.
- Select the blacklist creation option: Create a new blacklist or Import into existing blacklist. Refer to Import a Local Blacklist
- Select an overwrite option for preexisting terms.
- Select Clear before import if you want to ensure the import overwrites a clean blacklist.
- Click OK.
- On the Source Files tab, choose a method to add project source files.

Note: You can drag-and-drop files from a folder to the Files panel.

Note: To copy source files into the Source File folder within the Project folder on your computer, select Copy Source Files into Source Folder in your General Preferences.
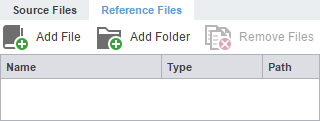
- (Optional) On the Reference Files tab, choose a method to add supporting documentation.
- (Optional) Select any additional Options.
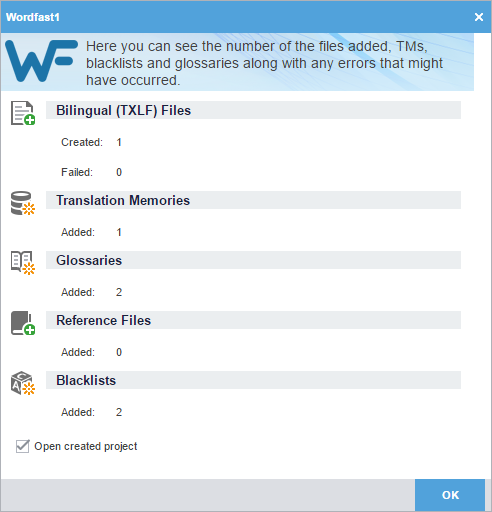
- Click Create Project to analyze the files and display the project creation summary.
- (Optional) On the WordFast1 dialog, select Open created project.
- Click OK.


