Working with terminology
Find below the procedures for the following tasks:
Setting copy term option
The copy term option copies the source segment to the target segment.
To set copy term option:
Open Wordfast Pro and click  .
.
The TXML perspective appears.
Click Terminology
> New/Select Glossary > Translations > Terminology.
The Preferences (Filtered) Terminology dialog box appears.
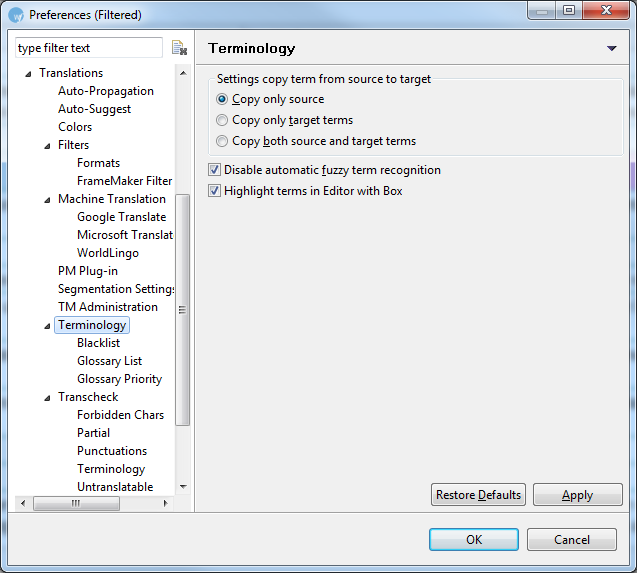
Select one of the following copy
term options:
Select Disable
automatic fuzzy term recognition checkbox to ensure that fuzzy
matches from the glossary are not leveraged.
Click Apply
and OK.
Auto propagating terms
To auto propagate terms:
Follow the steps to open a file
from Opening a file.
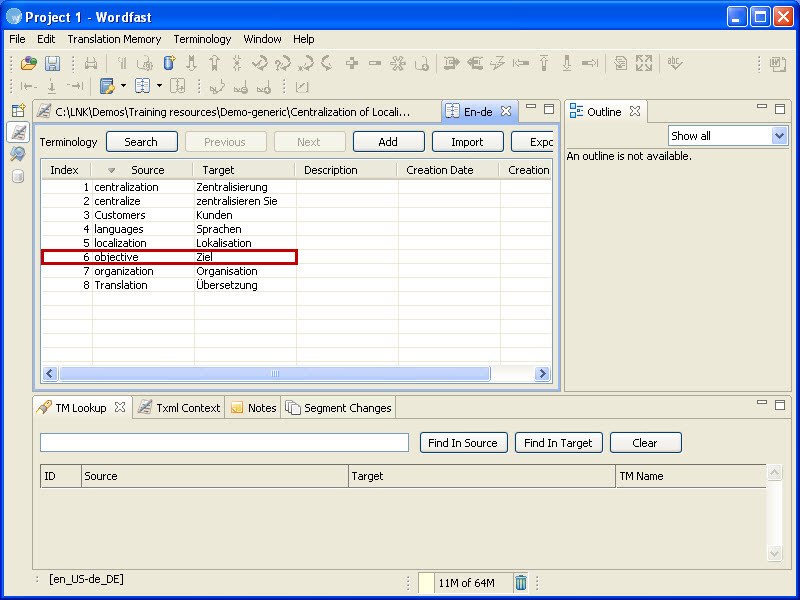
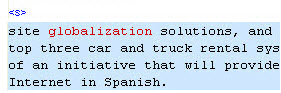
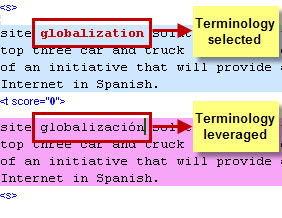
The file appears in the Translation window. If a term from the glossary
exists in the source segment, it will appear in red
by default.
Note: Ensure that a glossary is imported and selected for the
project. For more information, refer to Importing
a glossary.
Select Edit
> Copy Source or click  or press Alt+Insert,
to copy the text from the source segment into the target segment.
or press Alt+Insert,
to copy the text from the source segment into the target segment.
The glossary term translation is auto propagated as shown in the screenshot
below.
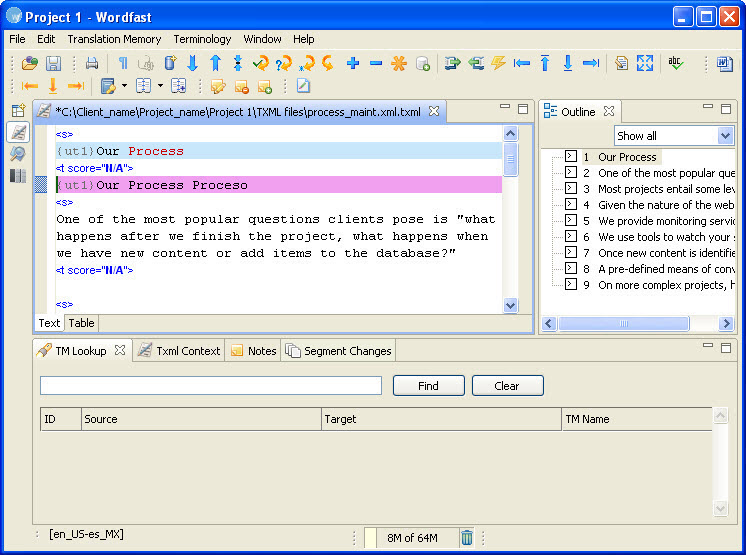
Note: The term 'Process' is followed by its translation 'Proceso'.
Using a term wildcard
To add and use a term wildcard:
Follow the steps to open a file
from Opening a file.
The file appears in the Translation window. If a term from the glossary
exists in the source segment, it will appear in red
by default.
Click Terminology
> Edit.
Select the glossary that you want
to edit.
The glossary appears.
Double-click on the entry you
want to modify.
The Edit term dialog box appears.
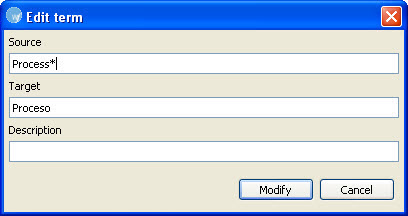
Type a '*' after the term to populate
all variations of the selected term. For example, the wildcard term 'Process*'
will populate the target 'Proceso' for all term variations such as 'Processes',
'Processing' and so on.
Click Modify.
The terminology wildcard is activated.
Leveraging a glossary
To leverage a glossary:
Follow the steps to open a file
from Opening a file.
The file appears in the Translation window. If a term from the glossary
exists in the source segment, it will appear in red
by default.
Select Terminology
> Previous Term / Next Term or click  or
or  or press Ctrl+Alt+8
/ Ctrl+Alt+9.
or press Ctrl+Alt+8
/ Ctrl+Alt+9.
The term is highlighted and selected.
In the target segment, place the
cursor at the location where you want the translated term to appear.
Select Terminology
> Copy Term or click  or press Ctrl+Alt+0.
The translated term appears in the target segment.
Adding terms
To add terms to a glossary:
Left-click and select a term in
the source or target segment.
Click Terminology
> Add Term or click  .
.
The Add Term dialog box appears.
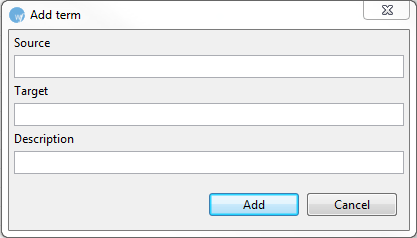
Enter Source,
Target and Description
of the term.
Select the glossary to which you
want to add the term.
Click OK.
The new term is added.
Editing terminology
To edit terminology:
Click Terminology
> Edit.
Select the glossary list that
you want to edit.
The glossary list appears.
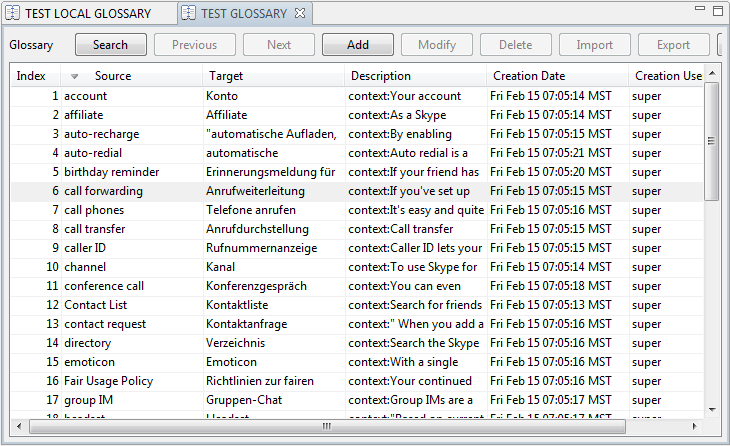
Double-click on the entry you
want to modify.
The Edit term dialog box appears.
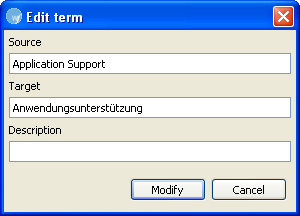
Enter the necessary changes and
click Modify.
The modified term appears in the glossary.
Adding blacklist
A blacklist includes words or phrases that should not
be used in the target segment.
To add a blacklist:
Click Edit
> Preferences > Terminology > Blacklist.
The Blacklist dialog box appears.
Click Create, to create a new
blacklist or Add, to add an existing blacklist.
Note: the blacklist must be a tab-delimited file.
Browse and select the location
of the new blacklist or existing blacklist.
Type a symbolic name and select
the language code of the blacklist.
Click OK.
The newly created or selected blacklist appears in the Blacklist List.
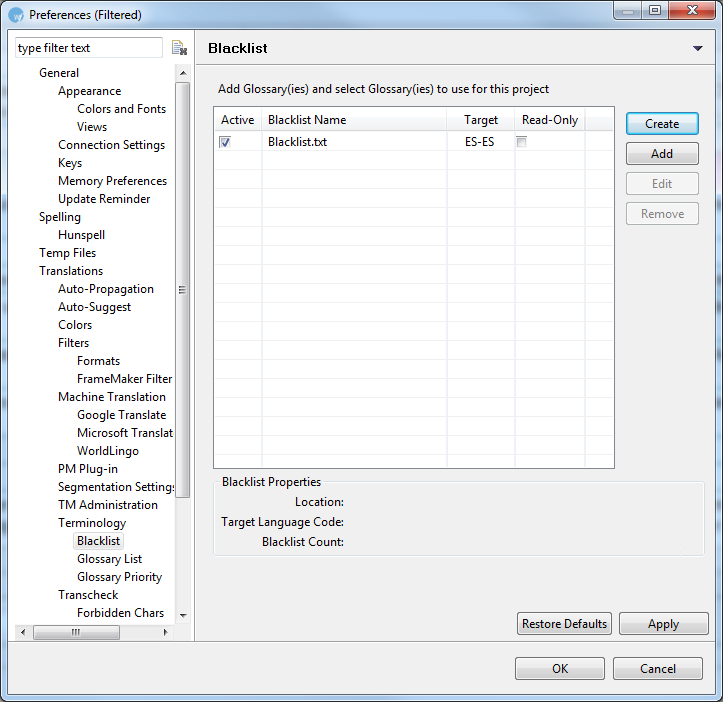
Select Selected
check box, to use the blacklist during translation.
Select Read
only check box, if you do not want to update the blacklist. (Optional)
Click OK.
A new or existing blacklist is created or opened for the project.
Editing blacklist
To edit an existing blacklist:
Open Wordfast Pro and click .
The TXML perspective appears.
Click on the Edit blacklist icon
and select the blacklist as shown in the screenshot below.
The Blacklist appears as a separate tab.
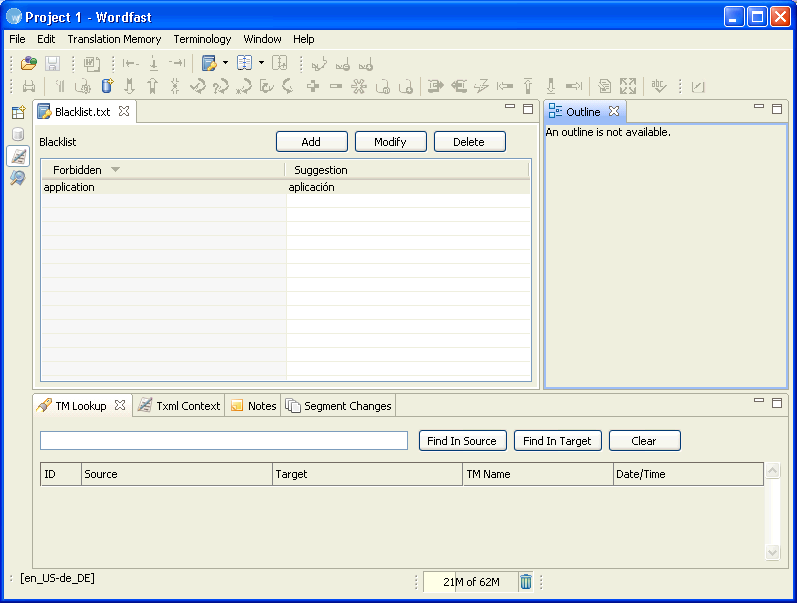
To add a term to the blacklist,
click Add.
The Add Term dialog box appears.

Enter the Forbidden and Suggested
term.
Click Add.
The forbidden term and suggestion appears in the blacklist.
To modify a term from the blacklist,
select the term and click Modify.
The Modify Term dialog box appears.
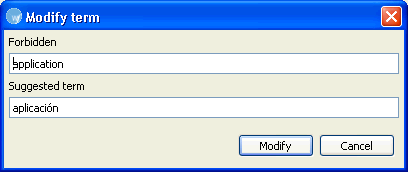
Edit the Forbidden and Suggested
term and click Modify.
To delete a term from the blacklist,
select the term and click Remove.
A warning message appears.
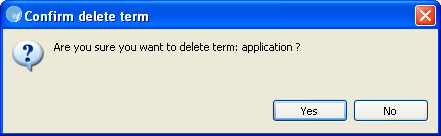
Click Yes
to delete the blacklisted term.
Wordfast
Pro and Wordfast Classic glossary synchronization
Wordfast Professional (WF Pro) and Wordfast Classic (WFC) can synchronize
their glossaries. A WF Pro glossary must be created for WFC to use it.
The WF Pro glossary file is located here: C:\Users\User\.wf_workspace\glossaries.
Beside the Lucene glossary folder, which has been created in the past,
a TXT file is created as well. WFC must connect to this TXT glossary file
(gl_1). Once the WF Pro glossary is created WF Pro must be closed in order
for WFC to connect to the WF Pro glossary. Every change on the glossary
file will be reflected and visible on both sides.
WF Pro cannot connect to the WFC glossary file, but it can import it
and WFC can reuse it by connecting to WF Pro glossary file.
The example below demonstrates glossary synchronization between WF Pro
and WFC.
Open a word document and activate
Wordfast Classic as shown in the screenshot below.
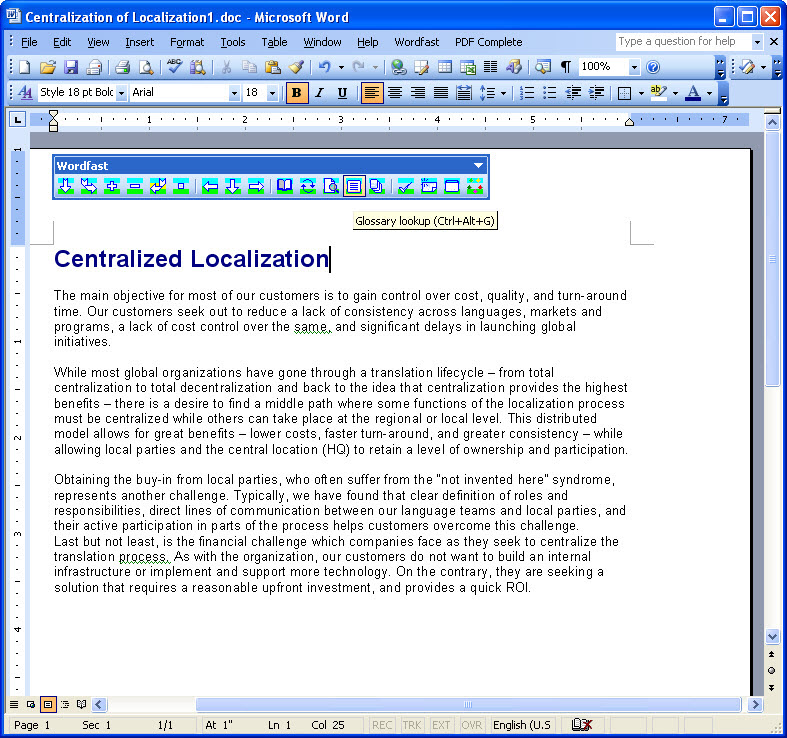
Click on a term that you would
like to add to the glossary and press Ctrl + Alt + T.
The Edit entry dialog box appears.
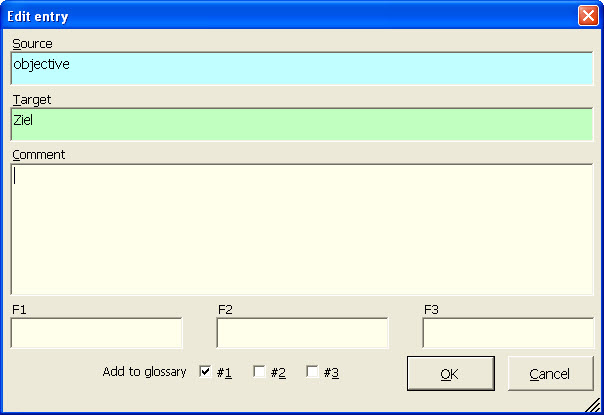
Enter the source and/or target
of the term and click OK.
The term is added to the glossary. For more information refer to the
Wordfast Classic training material available here: http://www.wordfast.com/store_download.html.
Open Wordfast Pro and click on
the Edit icon  and select the glossary that was updated using Wordfast Classic.
The new term will appear in the glossary as shown in the screenshot
below.