Translation memory (TM) is designed to provide maximum content re-use
and facilitate collaboration between globally distributed localization
resources. Translators can leverage reusable content in two ways:
Open Wordfast Pro and click  .
.
The TXML perspective appears.
Follow steps 1 to 6 from Creating
a project
Or
Click Translation Memory > New/Select
TM.
The Preferences (Filtered) dialog box appears.
In the left pane, click Translation Memory.
The Translation Memory dialog box appears.
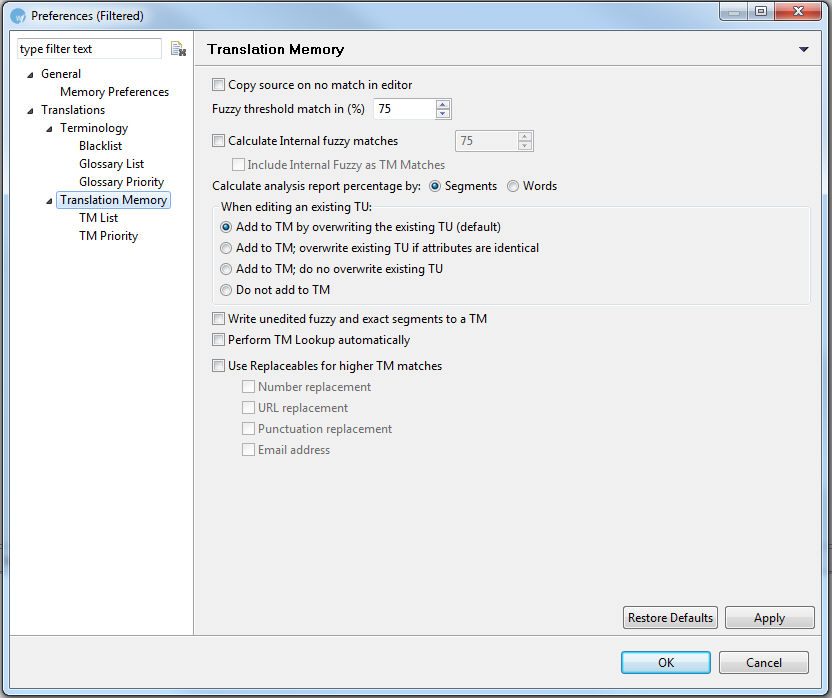
Select Copy
source on no match in editor checkbox to copy the source to the
target segment if there is no match when the TM is leveraged.
Enter the Fuzzy
Match Threshold in (%).
Note: This value signifies the TM leverage percentage limit
for a fuzzy match. For example, if you enter a value of 75%, the tool
will mark all the translations which are leveraged below 75% match as
a 'No match' segment.
Select Calculate
Internal fuzzy matches checkbox, to calculate internal
fuzzy matches in source files. For example, if there is a partial repetition
of segments in a source file, it will be calculated as an internal fuzzy
match.
Select the percentage that should be calculated for
such segments.
Select Include Internal
Fuzzy matches as TM Matches checkbox, to include internal repetitions
as a TM match.
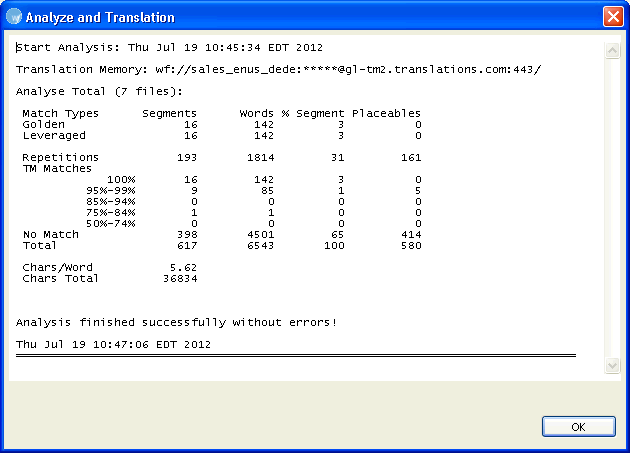
Select Calculate analysis
report percentage by options: Segment
or Words. The TM analysis report
will display either % Segments or % Words based on this selection as shown
in the screenshots below. Refer to Analyzing
files.

-
Select a condition to be followed when editing an
existing Translation Unit. The options are as follows:
|
Select |
to... |
|
Add to TM by overwriting the existing TU (default) |
overwrite the existing translation unit. This option is selected
by default. |
|
Add TM; overwrite existing TU if attributes are identical |
overwrite the existing translation unit only if custom attributes
for new and existing TU are identical. |
|
Add to TM: do not overwrite existing TU |
add to translation memory and not overwrite existing TU |
|
Do not add to TM |
not update the TM. |
Select checkbox to write unedited
fuzzy and exact segments to a TM.
Note: This option creates a local TM that can be used on your
desktop for local concordance searching. In this local TM, Machine Translated
and fuzzy matches appear as 100% matches. Therefore, it is suggested that
a new local TM is created for this purpose.
Select checkbox to perform TM
lookup automatically when navigating from one segment to the other.
Warning: Automatic TM lookup may affect system performance.
-
Select Use Replaceables
for higher TM matches checkbox to replace the following to get
higher TM matches:
|
Select |
to... |
|
Number replacement |
consider all numbers appearing in the source as a 100% match. All
decimals and mathematical notifications are considered numbers. Alphanumeric
values are not considered numbers. For example, 562HH |
|
URL replacement |
consider all URLs appearing in the source as a 100% match. |
|
Punctuation replacement |
consider all punctuation appearing in the source as a 100% match. |
|
Email address |
consider all email addresses appearing in the source as a 100% match. |
Click OK.
The translation memory properties for the project are set up.
Follow steps 1 to 2 from section
Selecting translation
memory settings.
In the left pane, select Translation Memory > TM List.
The Translation Memory - TM List dialog box appears.
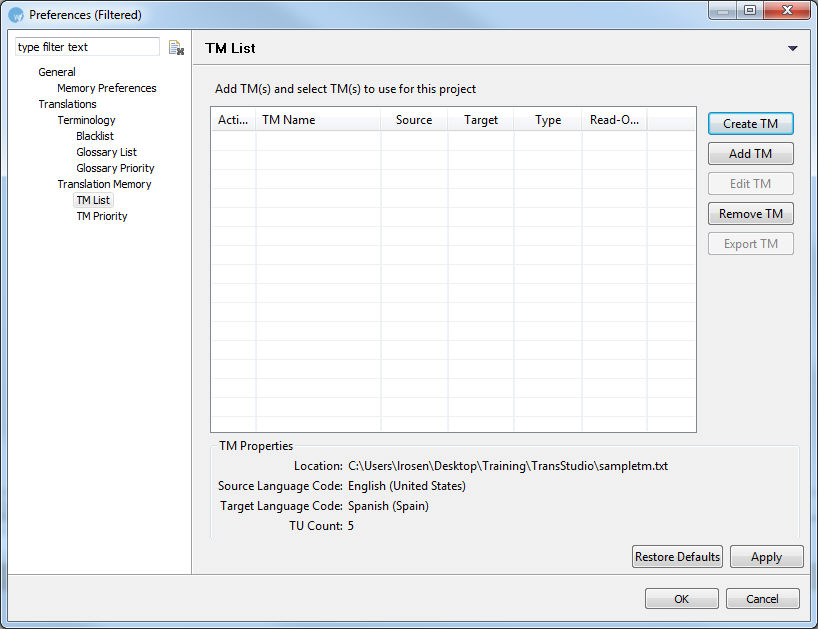
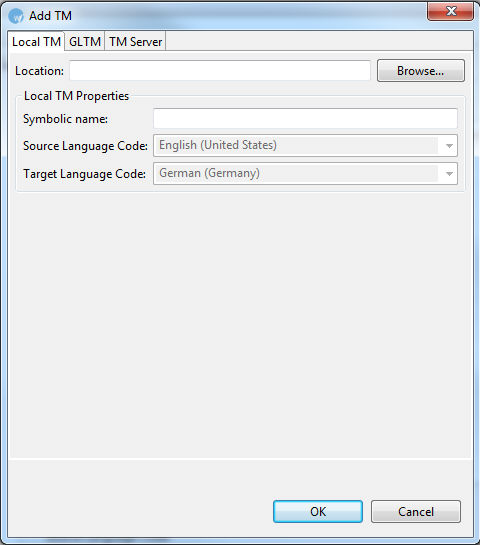
Click Create
TM.
The Create Local TM dialog box appears.
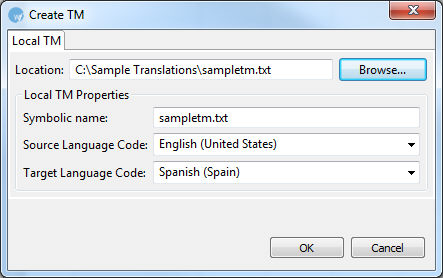
Enter or browse the location for
the local TM.
Enter a file name for the new
local TM and click Save.
Enter a Symbolic
name for the Local TM.
Note: Ensure that the name is unique and easily recognizable.
If a unique name is not given, an error message appears at the bottom
of the dialog box.
Select Source
and Target Locale.
Note: The default source and target languages are the same as
the currently open project. Ensure that the selected TM and project have
the same language pair assigned. If either of them is incorrect, the TM
will not be leveraged in the project.
Click OK.
The newly created local TM name appears in the TM List and the properties
appear at the bottom of the dialog box.
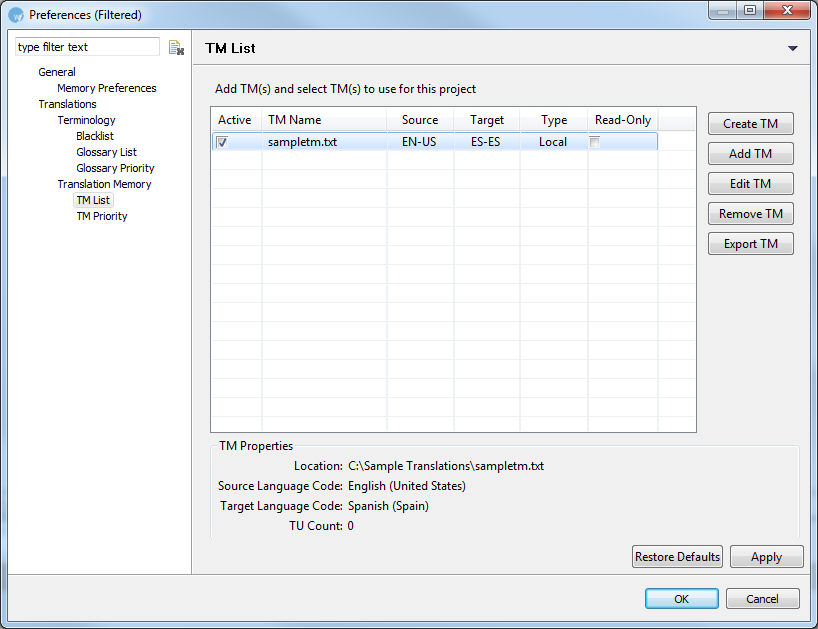
Select the Active
check box to use the newly created local TM during translation.
Select Read-Only
check box if you do not want to update the local TM. (Optional)
Click OK.
A new local TM is created for the project.
Follow steps 1 to 2 from section
Selecting translation
memory settings.
In the left pane, select Translation Memory > TM List.
The Translation Memory - TM List dialog box appears.
Click Add
TM.
The Add TM dialog box appears.
Click the GLTM
tab.
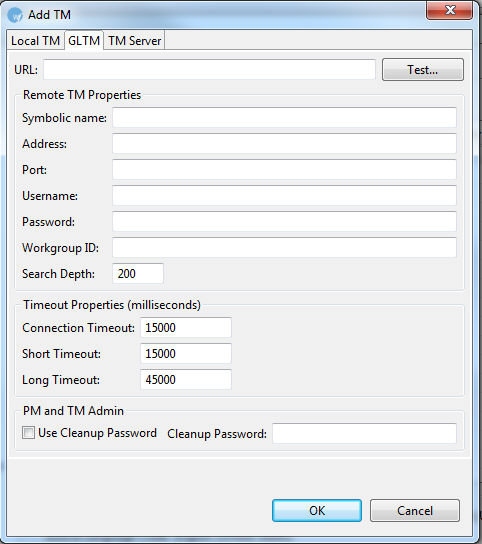
Enter the remote TM URL.
The remote TM information is populated automatically.
Alternatively, enter each of the
remote TM properties.
The remote TM URL is populated automatically.
Note: The remote TM URL and login details are provided to you
by the client, if they are using a Wordfast TM server.
After entering all remote TM information,
click Test.
Connection to the remote TM is established and a message appears.
Modify the Symbolic
name for the remote TM, if required.
Note: The default symbolic name is a combination of the user
name, address and port details.
Enter Workgroup
ID and Search Depth. (Optional)
Note: The Workgroup ID is a 10 digit number and is provided
to you by the Wordfast Pro
administrator. If a Workgroup ID is not entered, you can only read from
the remote TM. The Workgroup ID is required if you need to update the
remote TM.
Ensure that the user name is unique and easily recognizable.
Search depth signifies the number of results that can be viewed for
a particular search. For example, if you are looking for segments containing
the word "hotel", only the first 200 segments in the remote
TM containing that word will appear.
Enter Timeout
Properties.
There are three types of timeouts:
Connection Timeout: controls the
connection or disconnection timeout
Short Timeout: controls commands
that are expected to be completed immediately
Long Timeout: controls commands
that get serialized in the server's TM queue and possibly take a long
time to complete: searches, updates, concordance searches and so on.
Select Use
Cleanup Password to provide password to clean up target content
and update the TM.
Note: The password will be provided to you if you have Project
Manager role access rights.
Click OK.
The newly created or added remote TM name appears in the TM List and
the properties appear at the bottom of the dialog box.
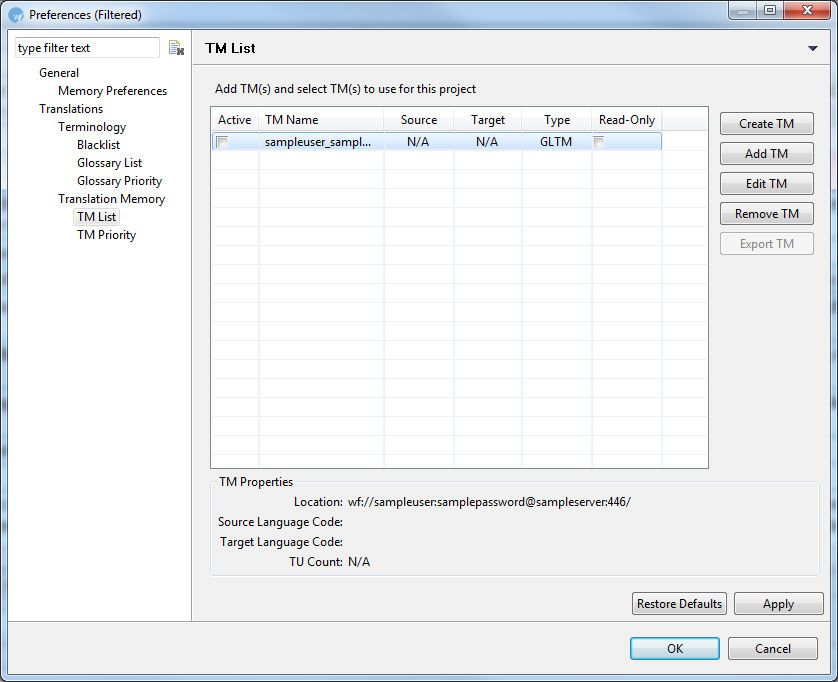
Select the Active
check box, to use the new remote TM during translation.
Select the Read-Only
check box, if you do not want to update the remote TM. (Optional)
Click OK.
A new or existing remote TM is created or opened for the project.
 or
or  to prioritize newly created or available
local TMs.
to prioritize newly created or available
local TMs.