- Go to the Projects list tab (refer to Opening Projects).
- Select and open the project.
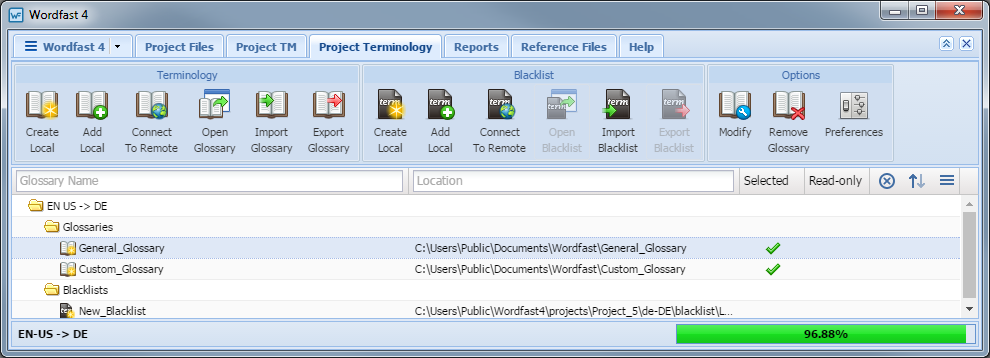
- Click the Project Terminology tab.
The Project Terminology tab appears.
The Glossary Name and Location columns can be ordered by typing the first letter or two of the item to head the list then clicking
 or
or  to the far right. These columns can be searched by typing in a string of characters that are contained in the entry of interest. When a matching, unique string is found in an entry, only that entry is presented in the list. To restore the list, click the Clear Filters icon
  .
. - Select the glossary to import.
- Click Import Glossary (shown above).
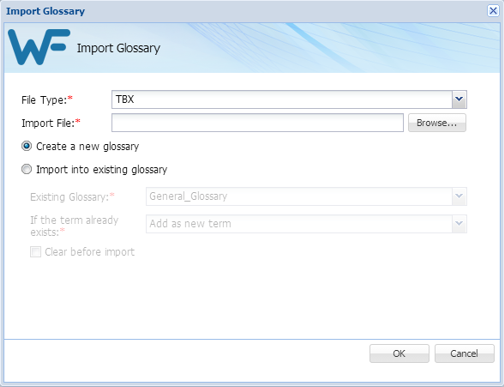
- Select a file type from the two options:
-
Tab delimited text file (.txt)—Wordfast Classic and Wordfast Pro 3 format

-
Term Base eXchange (.tbx)

-
- Enter or browse and select a glossary.
- Select one of the following options:
- Click OK to save the glossary changes.

