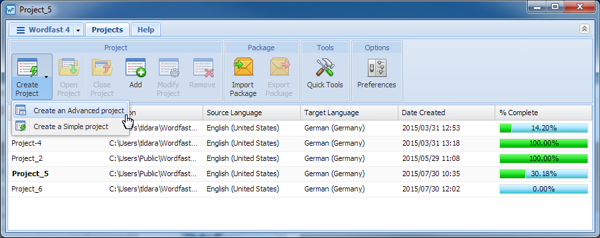
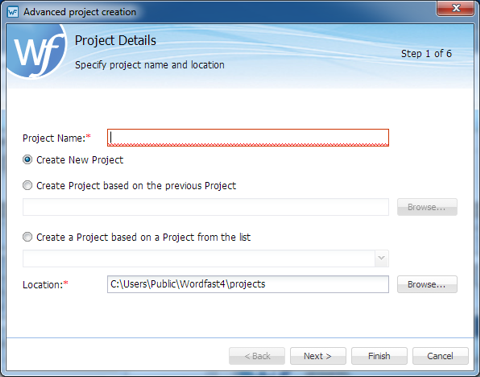
To create a project using the advanced project creation tool:
Click the Create ProjectDrop-down Symbol (downward pointing triangle) as shown below and the menu opens.
Select Create an Advanced project from the Create Project drop-down menu.
Figure 1. Projects Tab
Select an option for this project, the options are listed in the following table.
Figure 2. Advanced Project Creation
Option
Description
Create New Project
Begin from scratch in creating this project.
Create Project based on the previous Project
Begin with the profile of some previously created, local project.
Create a Project based on a Project from the list
Build a new project with initial content from a selected project found in the project list.
Location
Browse to a location where the new project is to be stored.
Enter a project name in the Project Name field.
Click Next.
Figure 3. Language Selection
Select the source and target languages:
To change the selected originating language, select a different language from the Source Language drop-down list.
To change the selected translated language, select a different language from the Target Language drop-down list.
Click Next.
Figure 4. Add Source Files
Add files using one of the following methods:
Drag the file(s) into the file list area
Click Add File and select the file(s)
Click Next.
Figure 5. Translation Memory Dialog
Note:
A green check-mark in the Valid column indicates the file is acceptable. A red X in the Valid column indicates that the file type is not supported by Wordfast Pro filters.
Fill in the Translation Memory dialog box fields.
Select a Translation Memory using one of the options:
Optionally, select Pre-translate TXLF files to pre-populate targets with Translation Memory matches.
Click Next.
Figure 6. Terminology
Select a Terminology glossary using one of the options:
Create– initiate a new, local Terminology database (Termbase)
Add Local– select an existing local Termbase to be selected through browsing
Add Remote– select an existing Term Manager connection
Modify– edit a Terminology Memory database (refer to Editing Local TM
Click Next.
Figure 7. References
Select a set of files for References using one of the following options:
Add File– select an existing reference file
Add Folder– select an existing folder for reference files
Remove– delete selected reference files from the list
Click Finish.
The document files are analyzed. A Progress bar pop-up shows the progress as percent complete.