Advanced Project Creation

In Advanced Project Creation you have the additional options to add remote translation memories, glossaries, and reference files.

To create a project using the advanced project creation wizard:

  1. Click the Create Project drop-down menu.
  2. Select Use the advanced project wizard.

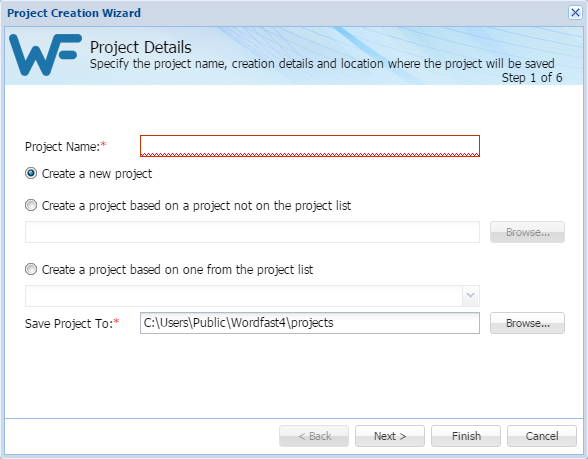
    The Project Creation Wizard appears.

  3. Enter a Project Name.
  4. Select an option for this project.

    Option

    Description

    Create a new project

    Create a project without reusing any previously created project.

    Create a project based on a project not on the project list

    Create a project reusing the profile of a previously created, local project.

    Create a project based on one from the project list

    Create a project with initial content from an existing project in the project list.

    Save Project To

    Browse to the location where the project will be saved.

  5. Click Next.

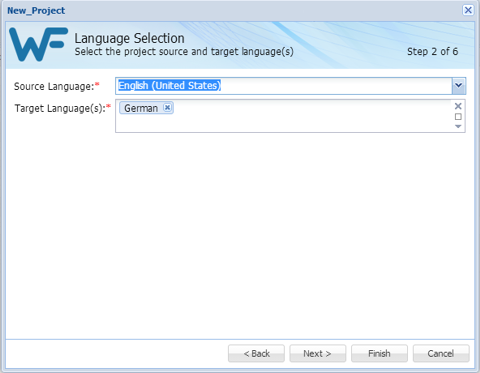
    The Language Selection dialog box appears.

  6. Select the source and target languages:
    1. To change the selected originating language, select a different language from the Source Language drop-down list.
    2. To change the selected translated language or add another language, select a different language from the Target Language drop-down list.
    3. Click Next.

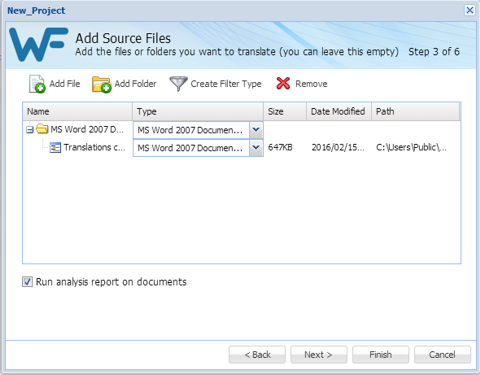
    The Add Source Files dialog box appears.

  7. To add files:
    • Click Add File to browse to the file.

    • Or, drag the file(s) from a folder to the Files panel.

      Note:

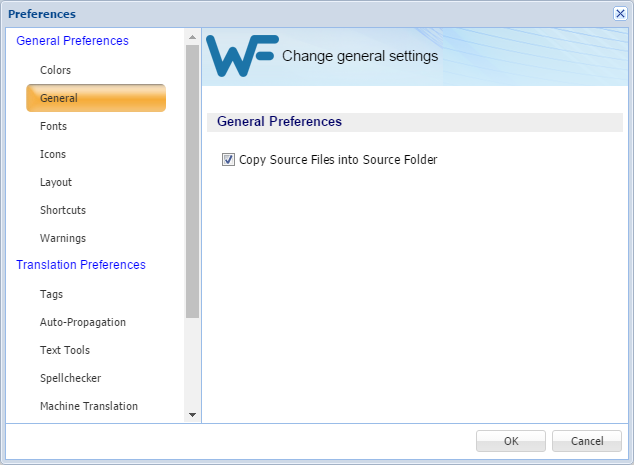
    To copy source files into the Source File folder within the Project folder on your computer, select the Copy Source Files into Source Folder checkbox in Preferences > General dialog box.

  8. Click Next.

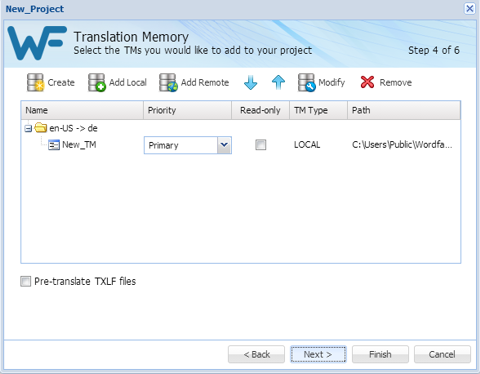
    The Translation Memory dialog box appears.

  9. Enter the required information.
    1. Create a local TM.
      • Enter a unique name for the new project.

      • Select the languages.

      • Browse and select the location where the TM file will be saved.

      • Select TM Priority.

      • Select whether TM will be Read-only.

    2. Add Local TM.
      • Select the TM folder.

    3. Add Remote TM.
  10. Click Next.

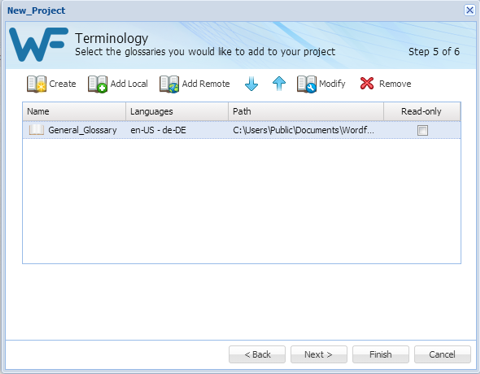
    The Terminology dialog box appears.

  11. Enter the required information.
    1. Create: create a new local glossary.
    2. Add Local: browse and select an existing local glossary.
    3. Add Remote: select an existing Term Manager connection.
  12. Click Next.

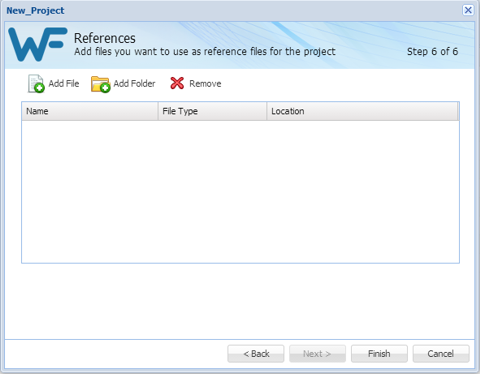
    The References dialog box appears.

  13. To add files:
    • Click Add File to browse to the reference file.

    • Click Add Folder to select a folder and add all reference files within.

  14. Click Finish.

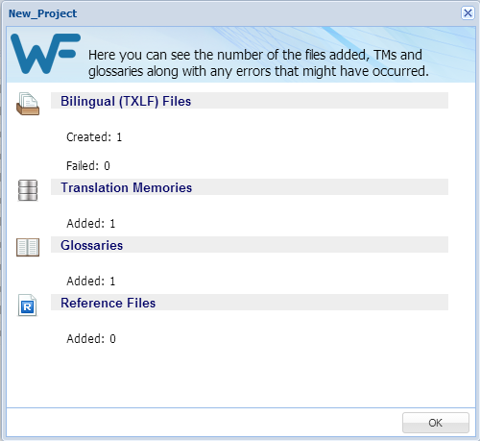
    The document files are analyzed. The Project Creation Summary appears upon completion.