Using TM Administration perspective
Using TM Administration perspective, users can view, edit and update
both local and remote translation memories. Find below the procedures
for the following tasks:
Updating TM Administration
preferences
To update TM Administration preferences:
Open Wordfast Pro 3 and click
 .
.
The TM Administration perspective appears.
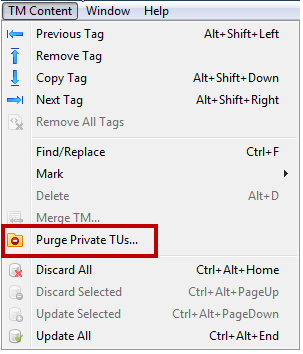
Click Edit
> Preferences.
The TM Administration dialog box appears.
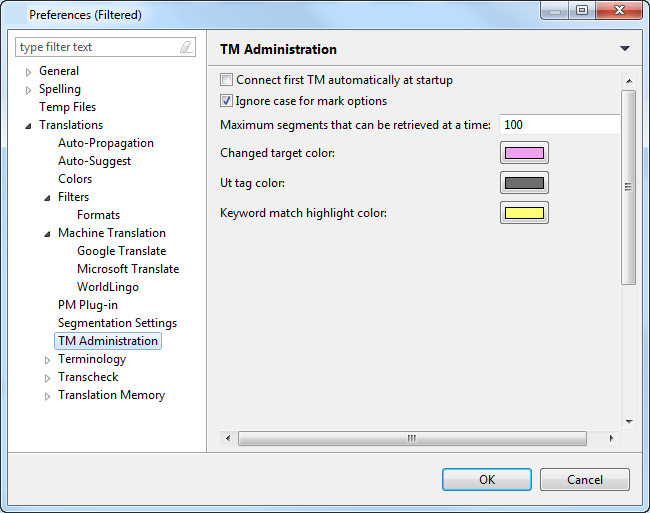
Update the preferences as
required. The TM Administration preferences are:
Option |
Description |
Connect first TM automatically
at startup |
Select
checkbox to view the TM content for the first TM in the TM
Servers list. |
Ignore case for mark
options |
Ignore
case for all mark options, except Mark TUs containing tags. |
Maximum segments that
can be retrieved at a time |
Enter
the number of segments that you wish to view at a time. |
Changed target color |
Click
on the color box and choose a color to represent edited TM
content. |
Ut tag color |
Click
on the color box and choose a color to represent tags. |
Keyword match highlight
color |
Click
on the color box and choose a color to represent keyword search
match. |
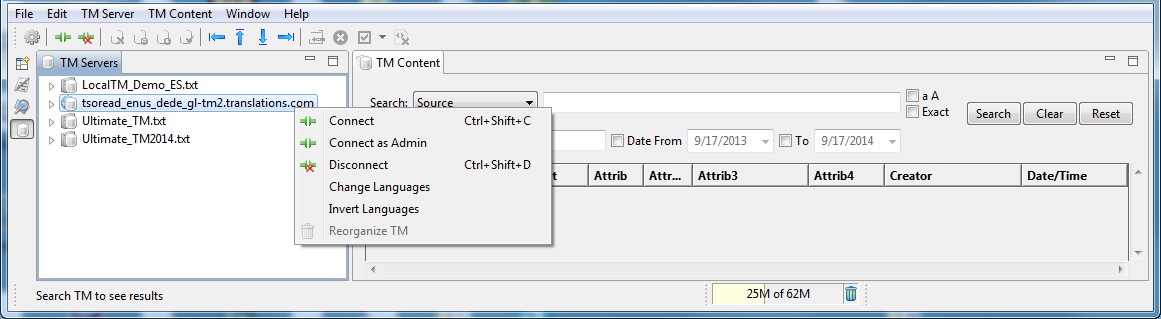
Connecting to a remote TM
Open Wordfast Pro 3 and click
.
The TM Administration perspective appears.
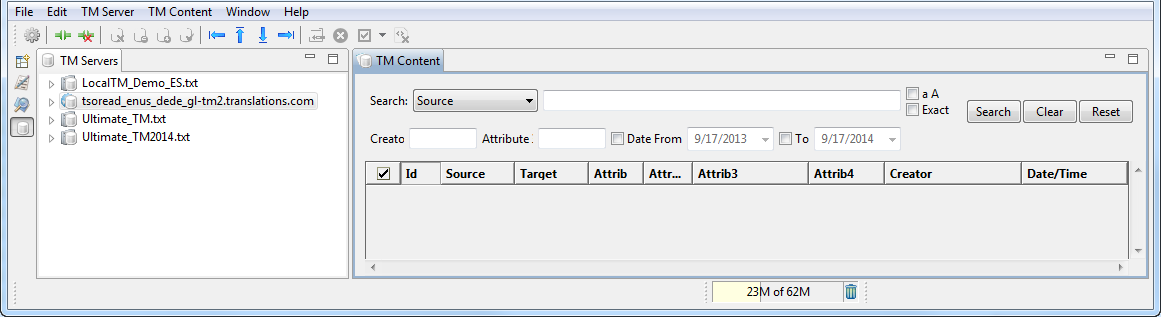
Right-click the TM.
To connect only, select Connect.
To connect as an administrator, Connect
as Admin.
The TM Admin password dialog box appears. To update a remote TM, it
is necessary to have an admin password. .
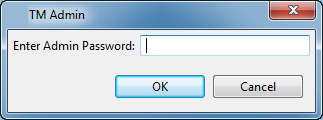
Enter the Admin password,
and click OK.
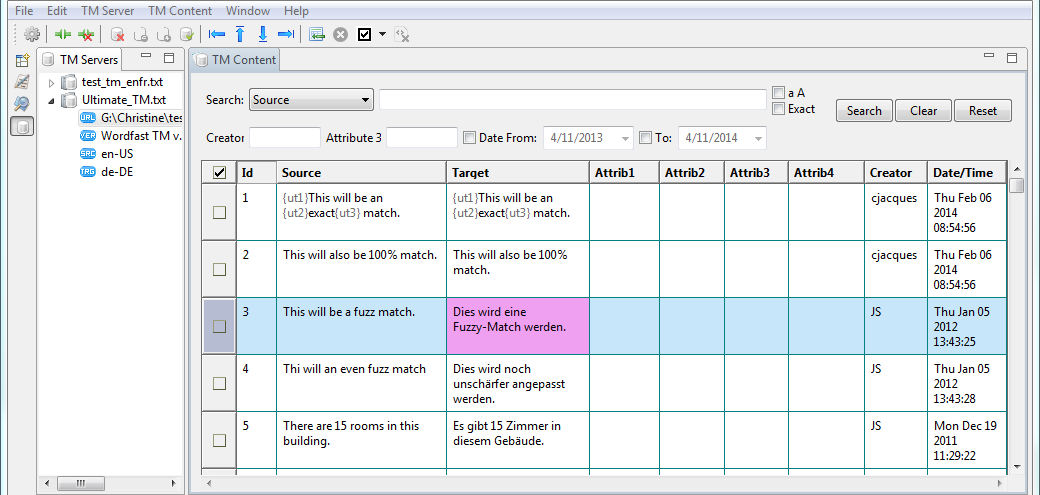
Modifying
TM content
To modify TM content:
Double-click a TM server on
the left pane or select a TM and click  .
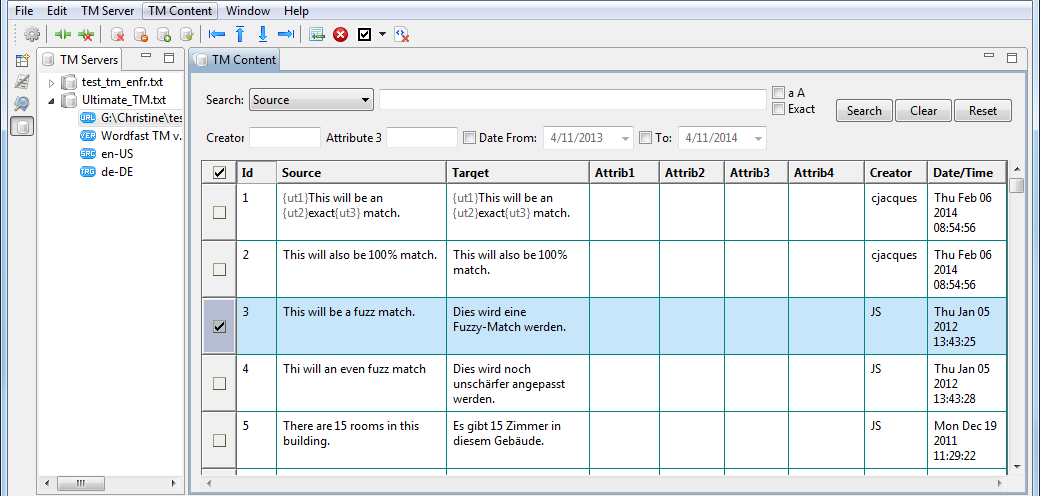
.
The TM content appears in the right pane.
Select or double-click the
segment that you wish to modify.
The segment is selected and highlighted in pink. You can change the
color by updating the TM Administration preferences.
Type the new translation and
click  .
.
If the remote TM does not include an administrative password, the following
dialog box appears.
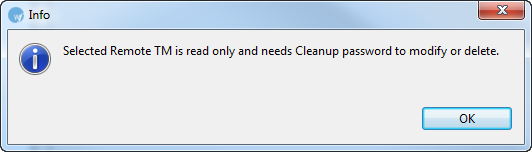
Click OK
or close the dialog box.
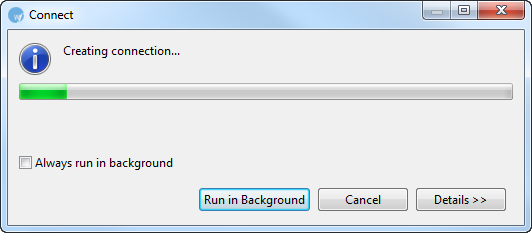
The remote TM connection is initiated.
Purging
private TUs
TM administrators can purge private TUs as part of the cleanup process.
Connect to a remote TM as
Admin as explained in Connecting
to a remote TM.
The TM content appears.

Click Purge
Private TUs on the toolbar,
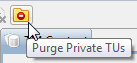
or click TM Content > Purge Private TUs.
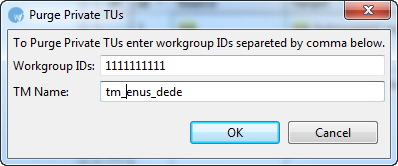
The Purge Private TUs dialog box appears.
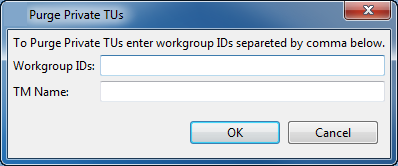
Enter the workgroup ID and
the TM name.
The Purging TUs message appears.
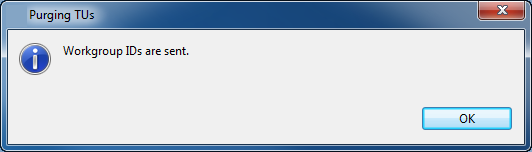
The private TUs are purged from the remote TM.
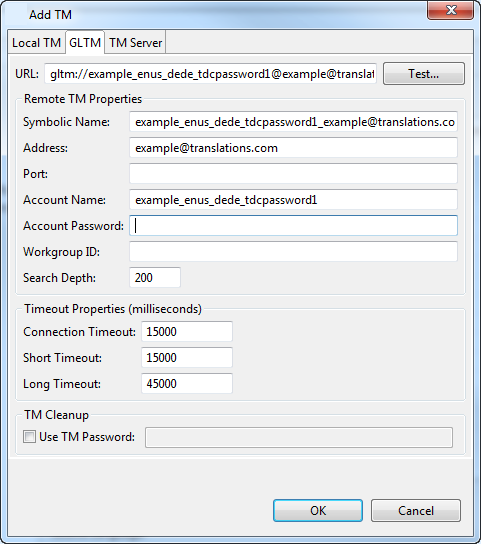
Adding an administrative password
When updating a remote TM, you must ensure the Administrative Password
is entered in the Add TM or Edit TM dialog box.
To add an administrative password:
Go to the Edit
menu and click Preferences
or press F9.
The Preferences (Filtered) dialog box appears.
Go to Translations
> Translation Memory > TM List.
Click Add
TM to add a new remote TM and enter the Administrative Password.
OR
Select an existing remote TM and click Edit
TM to enter the Password.
An example is shown below.
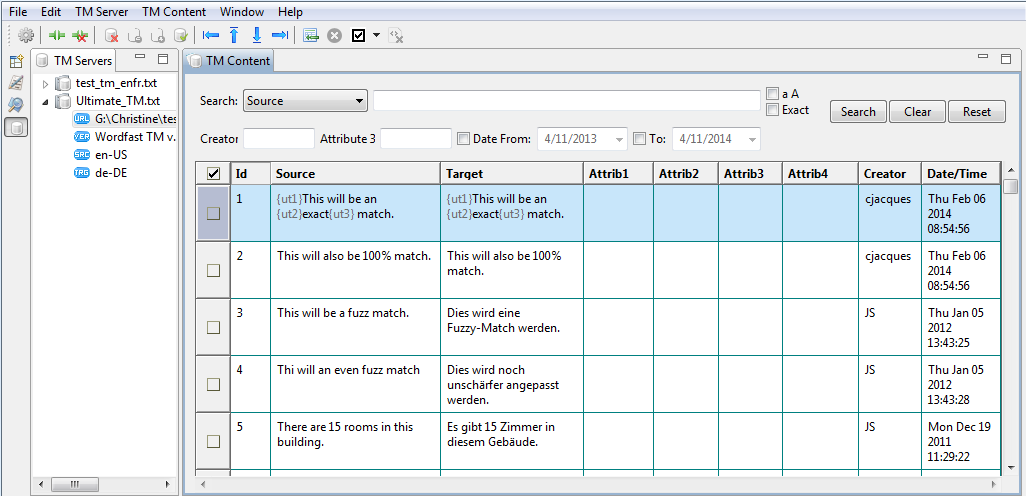
Finding
and Replacing Translation Units (TUs)
You can find and replace TUs within a TM using the find and replace
option.
To find and replace TUs:
Double-click a TM server on
the left pane
OR
Select a TM and click .
The TM content appears in the right pane.
Click TM
Content > Find/Replace or press Ctrl+F.
The Find/Replace dialog box appears.
Type the content in the Find and Replace
with fields.
Enable the following options,
if required:
Select |
to
find and replace... |
Direction |
Forward |
content
after of the cursor location. |
Backward |
content
before of the cursor location. |
Segment |
Source |
source
segments only. |
Target |
target
segments only. |
Source and Target |
both
source and target segments. |
Options |
Case sensitive |
content
with matching case. |
Whole word |
whole
words only. |
Wrap search |
starting
from and returning to the start location. |
Click Find
to find the first instance of the content or click Replace
All to replace all instances.
Click Replace/Find
to replace the searched content and find the next instance or click
Replace to replace the searched
content only.
Merging
local translation memories (TMs)
To merge local TMs:
Double-click a TM server in
the left pane.
OR
Select a TM and click .
Click TM
Content > Merge TM or  .
.
The Select TM to merge dialog box appears.
Select the local TM to merge
and click Open.
The Merge TM options appear.
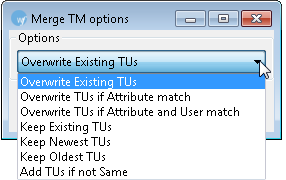
Select one of the Merge TM
options and click OK.
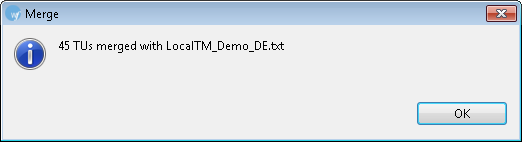
The two local TMs are merged and the following confirmation message
appears.
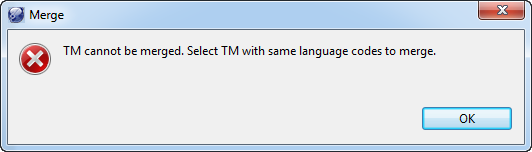
Note: Ensure that the source and target language codes of the
both the local TMs to be merged match. If not the following error
message appears.
Deleting
Translation Units (TUs)
To delete TUs:
Select the checkbox to select
TUs as shown in the screenshot below.
Click TM
Content > Delete or click  or press
Alt+D on the keyboard. A confirmation
message appears:
or press
Alt+D on the keyboard. A confirmation
message appears:
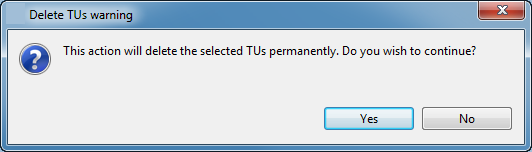
To delete the TUs click Yes. To cancel the operation click
No.
The selected TM is updated.
Marking
Translation Units (TUs)
You can select TUs based on different criteria to edit
them.
To mark TUs:
Double-click a TM server on
the left pane or select a TM and click .
Click TM
Content > Mark and choose one of the options or click the
Mark TUs icon  as shown in the screenshot below.
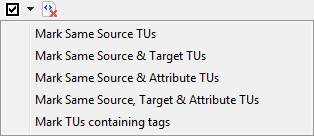
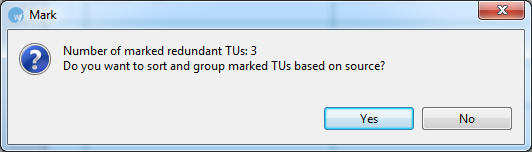
Select one of the options.
A confirmation message appears.
The Mark Same Source TUs option results in the following message:
The Mark TUs containing tags option results in the following message:
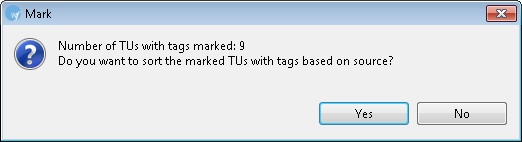
Click Yes,
to sort the marked TUs and display it on top of the TM Content panel.
Note: The first TU in the group of redundant TUs will not be
checked. The remaining redundant TUs are checked, allowing for easy
viewing and deleting of TUs.
Removing
all tags from selected Translation Units (TUs)
Select the TU(s) from which
you want to remove tags.
Click TM
Content> Remove All Tags.
Or
Click  on the TM Admin
toolbar.
on the TM Admin
toolbar.
The tags are removed from the selected segment(s).
 To remove tags from all segments, select
all segments.
To remove tags from all segments, select
all segments.
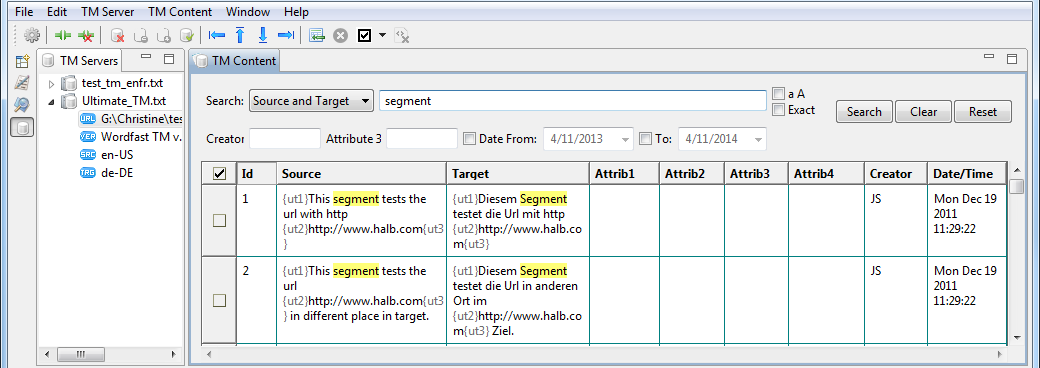
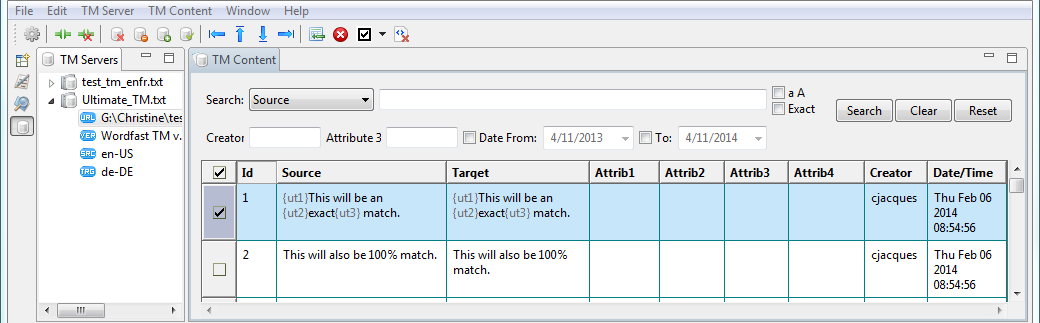
Searching
TUs
To search for a term or word within a TU:
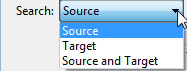
Click the Search drop-down
menu to select Source, Target, or Source
and Target.
Enter the term to be searched
in the search box.
Check Case
 to specify if the term is case-sensitive.
Check Exact
 to restrict the search to exact
matches.
to restrict the search to exact
matches.
Enter Creator
to search by creator of the term.
Click Attribute
to search by attribute added to the TXML file.
Specify the From and To dates
for terms that were modified w/in a certain time period.
Click Search.
An example of a completed search is provided below.