Enabling Machine Translation
Wordfast Pro
includes an automated machine translation feature which populates translations
whenever a file is open or when there are no translation memory segment
matches.
To enable Machine Translation:
Open Wordfast Pro and click Edit
> Preferences > Translations > Machine Translation.
The Machine Translation Preferences
dialog box appears.
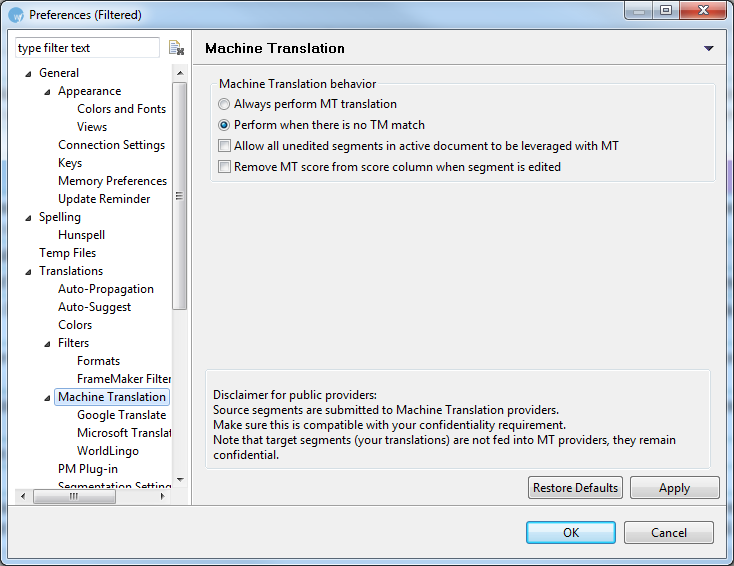
Choose one of the following:
Select check boxes if you wish
to allow all unedited segments in active document to be leveraged with
MT and to remove MT score from score column when segment is edited.
Please read the disclaimer carefully.
Click Apply.
You can enable either Google
Translate, Microsoft Translate
and/or WorldLingo.
Google Translate
To enable Google Translate:
Open Wordfast Pro and click Edit
> Preferences > Translations > Machine Translation > Google
Translate.
The Google Translate Preferences dialog
box appears.
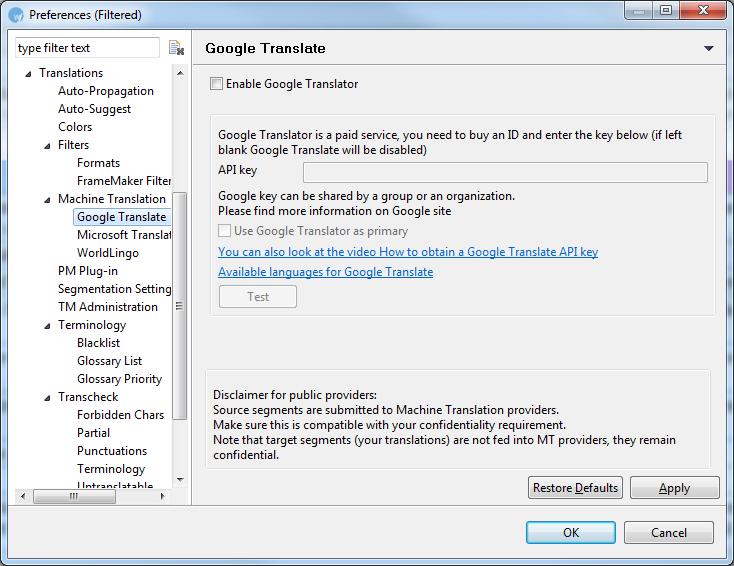
Select Enable
Google Translator checkbox to populate preset translations.
Enter the API key, which is mandatory
to use Google Translate. Click on the You
can also look at the video How to obtain a Google Translate API key
for more information.
Select Use
Google Translator as primary checkbox to give Google MT preference
over other Machine Translation service.
Click Test
to test the service.
Click Apply
to save the selection and OK if
you wish to close the Preferences dialog box.
Microsoft Translate
To enable Microsoft Translate:
Open Wordfast Pro and click Edit
> Preferences > Translations > Machine Translation > Microsoft
Translate.
The Microsoft Translate Preferences
dialog box appears.
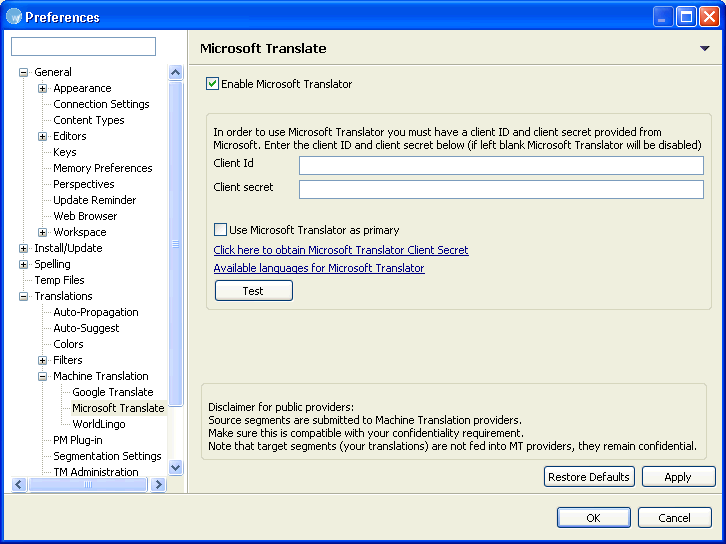
Select Enable
Microsoft Translator checkbox to populate preset translations.
Enter the Client
Id and Client Secret, which
are mandatory to use Microsoft Translate. Click on the Click
here to obtain Microsoft Translator Client Secret for more information.
Select Use
Microsoft Translator as primary checkbox to give Microsoft MT preference
over other Machine Translation service.
Click Test,
to test the service.
Click Apply
to save the selection and OK if
you wish to close the Preferences dialog box.
WorldLingo
To enable WorldLingo:
Open Wordfast Pro and click Edit
> Preferences > Translations > Machine Translation > WorldLingo.
The WorldLingo Preferences dialog
box appears.
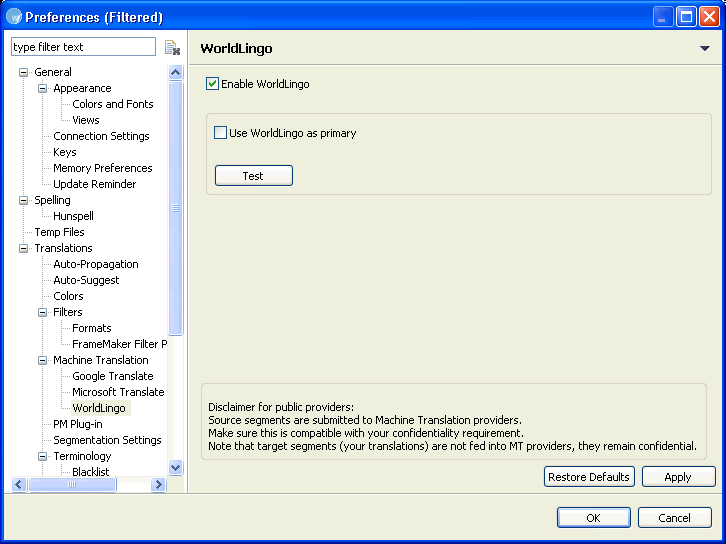
Select Enable
WorldLingo checkbox, to populate preset translations.
Select Use
WorldLingo as primary checkbox to give WorldLingo preference over
other Machine Translation service.
Note: WorldLingo MT is limited to the following languages:
Click Test,
to test the service.
Click Apply
to save the selection and OK if
you wish to close the Preferences dialog box.
Using machine translation
To use machine translation:
In the TXML Editor, open a file
for translation.
Click  or press Alt+-,
click
or press Alt+-,
click  or press Alt+Down or
click
or press Alt+Down or
click  or press Alt+Up.
The machine translation will appear in the TM Lookup window.
To populate the machine translation
in the target segment, click  or right-click in the target segment and
click Machine Translation. Find
below and example screenshot of a machine translated file.
or right-click in the target segment and
click Machine Translation. Find
below and example screenshot of a machine translated file.
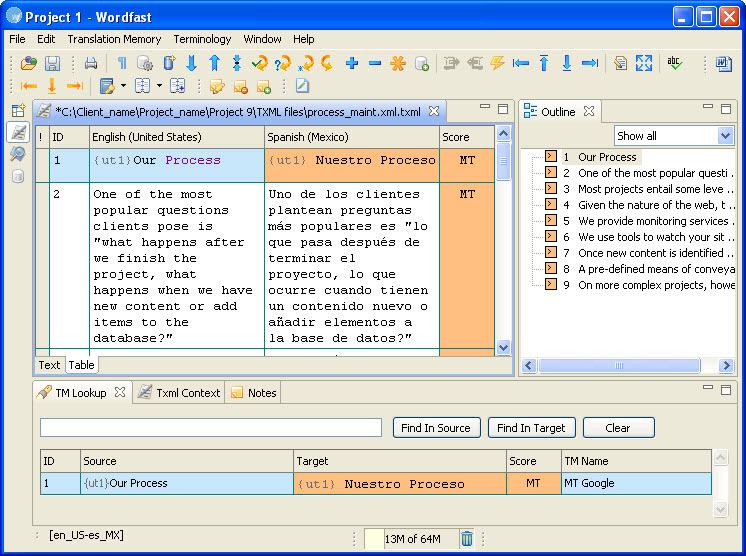
Note: Machine translated content is highlighted in orange by
default and marked as MT in the
Score column. If required, the default color code can be modified. Refer
to Defining color
codes.