Setting up filters
A filter defines the working parameters for different types of files
received for translation. A filter can be selected from the available
list or a new format created. Please note that the process to add MS Excel
files is different from the other file filters. Additionally, Wordfast Pro supports
only those TTX files that are translated and segmented using tag editor.
The TTX files must be renamed to match the source format if they need
to be viewed in tag editor.
Find below the procedures for the following tasks:
Selecting filter settings
There are two common filter settings that can be enabled by navigating
to Edit > Preferences > Translations
> Filters as shown in the screenshot below.
Numbers extraction: Check to extract
all number only segments to the translatable TXML file. Uncheck to not
include number only segments to the translatable TXML file
Segmentation on break: Select to segment
the text at every logical break such as period (.) or soft return.

Viewing default file filters
A number of filters are pre-configured for your convenience. For example,
if you choose the Default Java Properties Filter, the Encoding UTF-8 is
automatically selected.
To view a default file filter:
Open Wordfast Pro and click Edit
> Preferences > Translations > Filters > Formats.
The Formats dialog box appears. The default filters appear in the Available
formats box.

Select a default filter of your
choice. For example, if you select Default HTML Filter, the options for
HTML files appear in the Options box as shown below.

If required, you can modify the
default options.
Adding new file filters
If the filter of your choice is not available in the default option,
you can add a new filter. For example, for XML and Excel filters you will
need to provide additional information.
To add an XML filter:
Follow steps 1 and 2 from Viewing
default file filters.
The Formats dialog box appears. The default filters appear in the Available
formats box.
- Click New.
The New Format dialog box appears.
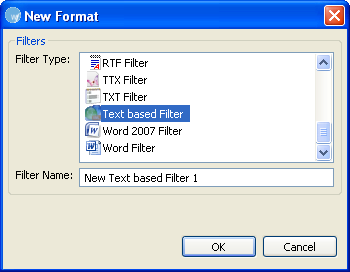
- Select the Text
based Filter Type and click OK.
The New Text based Filter appears in the Available Formats box.

- Select the filter and click Rename,
to change the filter name.
- Select the Encoding
as UTF-8.
Browse and select the Conversion
rules file.
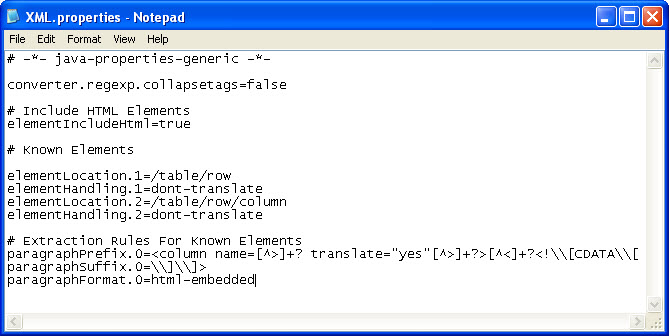
Note: The conversion rules file includes commands describing
the content to be translated in the XML files. Find below an example rules
file.
Click Apply
and OK.
A new XML filter is set up.
Adding an Excel file filter
To add an Excel file filter:
Follow steps 1 and 2 from Viewing
default file filters.
The Formats dialog box appears. The default filters appear in the Available
formats box.
Select Format Type
as Default Excel Filter.
The Excel Filter options appear.

Click Setup.
The Choose Excel file... dialog box appears.
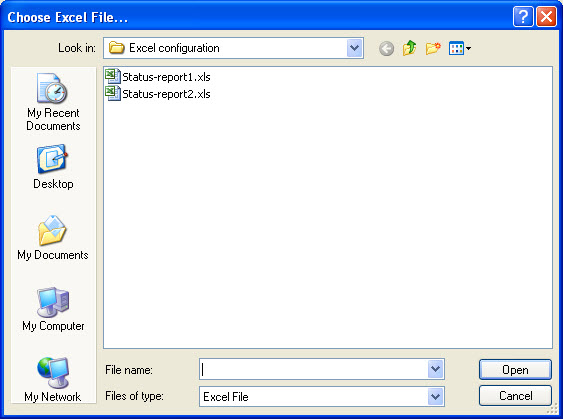
Select an Excel file and click
Open.
The Excel column selection wizard Instructions page appears.
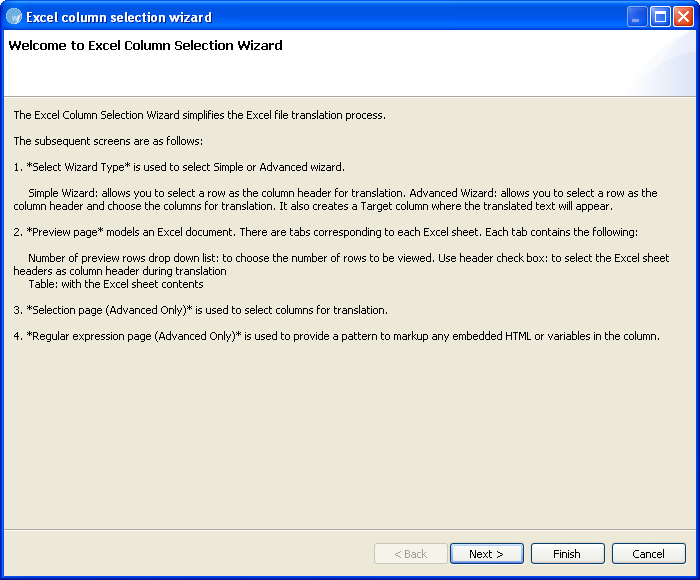
Read the instructions carefully
and click Next.
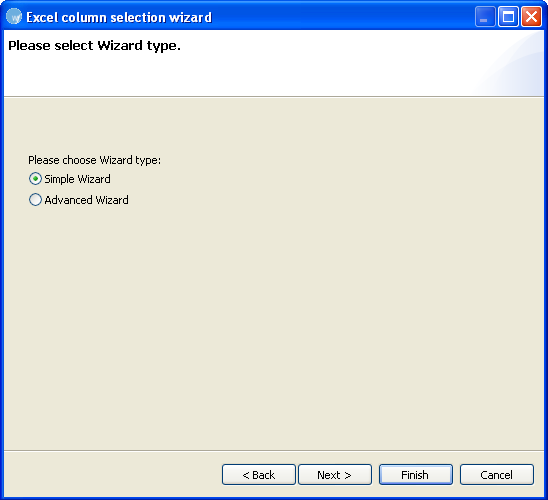
The Select wizard type page appears.
-
Select the wizard type. You have two options:
Simple wizard
To run the Simple wizard:
Follow steps 1 to 6 from Adding
an Excel file filter.
Select Simple wizard and click
Next.
The Preview page appears.
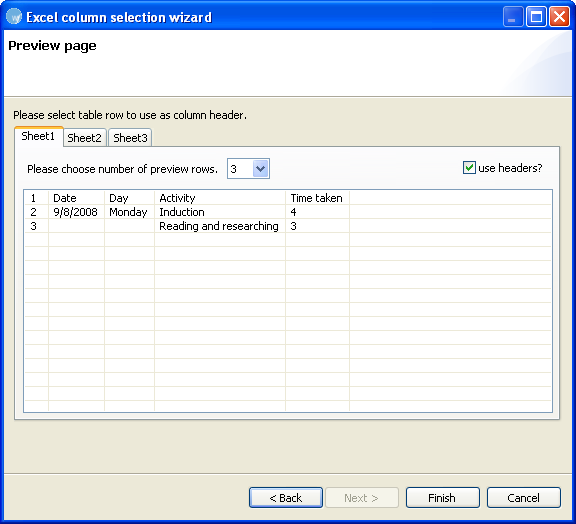
The content in the Preview page
is selected for translation.
The Preview page models an Excel file. There are tabs corresponding
to each Excel sheet. Each tab contains the following:
Number of preview rows drop down
list: to choose the number of rows to be viewed
Use header check box: select checkbox,
to select the Excel sheet headers as column header while selecting translatable
content in the next step
Table with the Excel sheet contents:
select any row to include the selected row and all rows below for translation.
Rows above the selected row will not be translated.
Click Finish.
The configuration and sample file path appears in the Formats Options
box as shown in the screenshot below.

Select Translate
Sheet Names checkbox to include sheet names as translatable text.
Select Translate
hidden rows and columns checkbox to include rows and columns hidden
in the Excel file as translatable text.
Select Translate
cell with formulas checkbox to include cells with notes and formulas
as translatable text.
Select Treat
numbers stored in text format as real numbers checkbox to include
numbers as translatable text.
Click Apply
and OK.
An Excel file filter is set up.
Note: You can now directly open Excel files of this type. While
opening files you must choose the correct filter, when prompted. You can
also rename the filter using the Rename
button.
Advanced wizard
To run the Advanced wizard:
Follow steps 1 to 6 from Adding
an Excel file filter.
Select Advanced wizard and click
Next.
The Preview page appears.
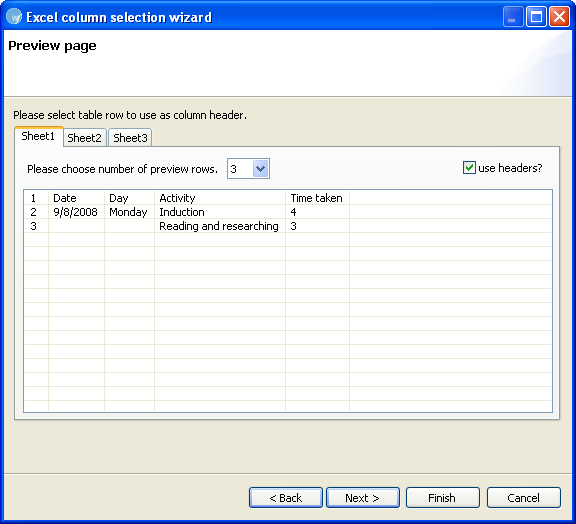
The Preview page models an Excel
file. There are tabs corresponding to each Excel sheet. Each tab contains
the following:
Please choose number of preview
rows drop down list: to choose the number of rows to be viewed
Use headers check box: select checkbox,
to select the Excel sheet headers as column header while selecting translatable
content in the next step
Table with the Excel sheet contents:
select any row that should not be translated.
Click Next.
The Selection page appears. If you have selected the Use header checkbox,
the Excel sheet headers appear as column names.
In the Translate column, select
the columns for translation.
The corresponding Column name appears in the Target column as shown
in the screenshot below.
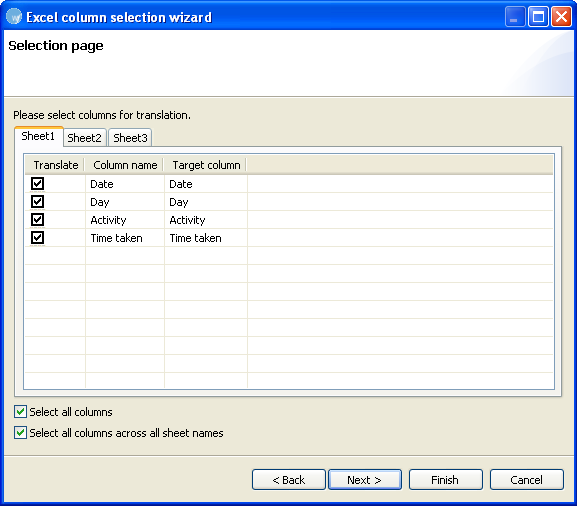
Note: The Target column includes names of columns where the
translated text will appear.
If you wish to select all columns
in the currently open sheet, check Select all columns.
If you wish to select all columns
across all sheets, check the corresponding checkbox.
Click Next.
The Regular expression page appears.
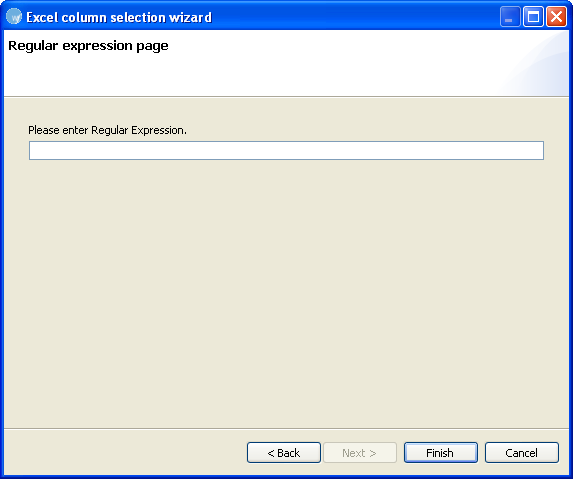
Enter a Regular
Expression for the Excel analysis.
Note: A regular expression provides a pattern to markup any
embedded HTML tags or variables in a column as tags.
Click Finish.
The configuration and sample file path appears in the Formats Options
box as shown in the screenshot below.

Select Translate
Sheet Names checkbox to include sheet names as translatable text.
Select Translate
hidden rows and columns
checkbox to include rows and columns hidden in the Excel file as translatable
text.
Click Apply
and OK.
An Excel file filter is set up.
Note: You can now directly open Excel files of this type. While
opening files you must choose the correct filter, when prompted. You can
also rename the filter using the Rename
button.
Adding a PPT file filter
To add a PPT file filter:
Follow steps 1 and 2 from Viewing
default file filters.
The Formats dialog box appears. The default filters appear in the Available
formats box.
Select Format Type
as Default PowerPoint Filter.
The PowerPoint Filter options appear.

Select Translate
master slide checkbox to include master slide content as translatable
text.
Select Skip
Notes Pages checkbox to exclude notes as translatable text.
Click Apply
and OK, to confirm the PPT filter
preferences.
Selecting FrameMaker
filter preferences
The FrameMaker filter preferences must be set before using this filter
option.
To set FrameMaker filter preferences:
Open Wordfast Pro and click Edit
> Preferences > Translations > Filters > FrameMaker Filter
Preferences.
The FrameMaker Filter Preferences
dialog box appears.
Note: The MIF versions supported are 7, 8 and 9.
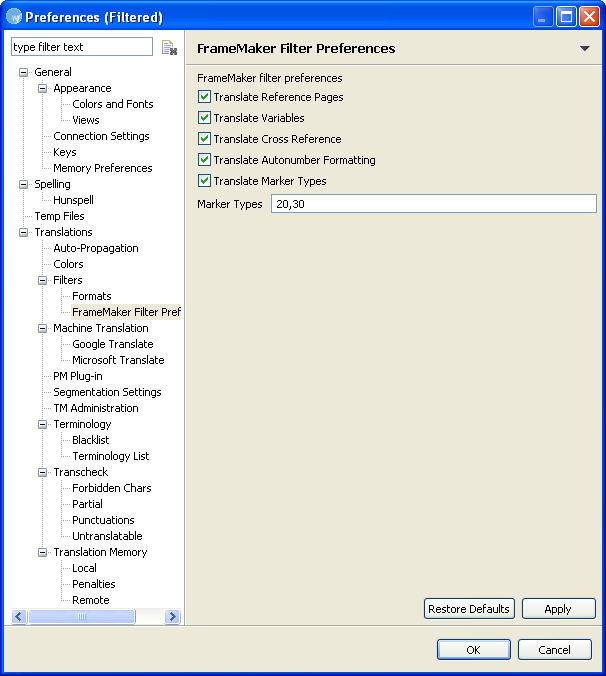
Select the required FrameMaker
filter preferences.
Select the corresponding checkboxes
to translate reference pages, variables, cross references, autonumber
formatting,
and marker types that appear in FrameMaker files.
Click Apply
and OK, to confirm the FrameMaker
filter preferences.


