Connect to a Remote TM

You can connect to one or more translation memories (TMs) on other computers, including a free, hosted service:, such as Wordfast Anywhere (WFA).

  Note:

WFA allows translators to connect to a shared server and interact with a private, remote TM and glossary.

To connect to a remote TM:

  1. On the Projects tab, double-click a project from the projects list to open it.
  2. In the Current Project view, and on the Project TM tab, click Connect To Remote.
  3. On the Connect to Remote TM dialog, select the appropriate tab, based on your server options.
    • TM Server

    • WF Server

    • WFA Server

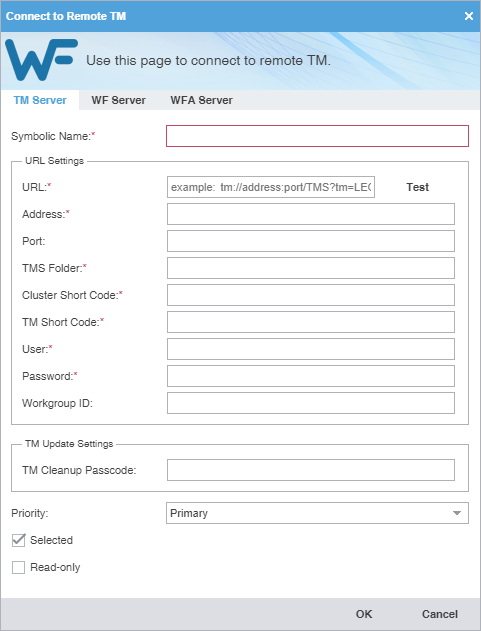
  4. (Optional) Add a TM Server on the TM Server tab, complete the required fields, then click OK.

    Required fields are marked with a red asterisk.

    Field or Option

    Action

    Symbolic Name

    Enter a unique name for the TM.

    URL

    Enter the remote TM URL using the following format: tms://address:port/TMS?. The remaining URL Settings automatically populate when you enter the URL string. Click Test to validate the connection.

    TM Cleanup Passcode

    Enter the password to update the TM for the project.

    Priority

    Select a priority from the drop-down list.

    The priority determines the sequence of reference during translation, first referencing the primary TM, then any secondary TMs. You can only designate one TM as primary.

    Selected

    (Optional) Select to use the current TM for the project.

    Read-only

    (Optional) Select to leverage the TM without updating it with the new translation.

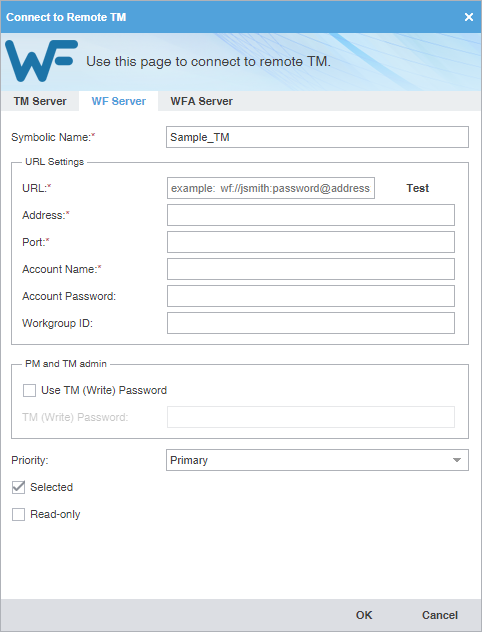
  5. (Optional) Add a WF Server on the WF Server tab, complete the required fields, then click OK.

    Required fields are marked with a red asterisk.

    Field or Option

    Action

    Name

    Enter a unique name for the TM.

    URL

    Enter the remote TM URL using the following format: wf://jsmith.password@address:port/TMS?. The remaining URL Settings automatically populate when you enter the URL string.

    (Optional) The Password and Workgroup ID fields depend on server settings.

    Click Test to validate the connection.

    Address

    Enter the address associated with the URL.

    Port

    Enter the port associated with the URL.

    Account Name

    Enter the username associated with the URL log in.

    Account Password

    (Optional) Enter the password associated with the username.

    Workgroup ID

    (Optional) Enter the workgroup ID for the project.

    Use TM (Write) Password

    Enable, if you are a PM or TM Administrator, to require a password to overwrite the existing TM with new translations.

    TM (Write) Password

    If enabled, enter the password to overwrite the existing TM with new translations.

    Selected

    (Optional) Select to use the current TM for the project.

    Read-only

    (Optional) Select to leverage the TM without updating it with the new translation.

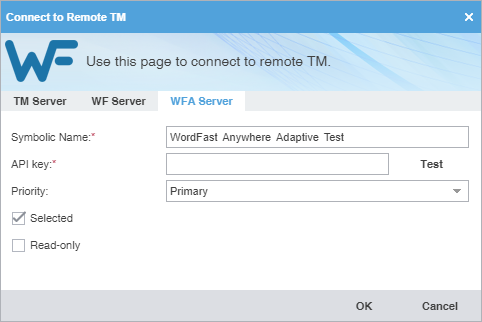
  6. (Optional) Add a WFA Server on the WFA Server tab, complete the required fields, then click OK.

    Required fields are marked with a red asterisk.

    Field or Option

    Action

    Symbolic Name

    Enter a unique name for the TM.

    API key

    Enter the API key you obtain from WFA.

    1. Log in to your free WFA account at https://www.freetm.com.

    2. Click TMs & Glossaries, then Setup.

    3. On the TMs and glossaries management dialog, select a TM or glossary.

    4. Click Manage Sharing.

    5. On the TMs and glossaries shares dialog, click the API key and copy the text string.

    6. Paste the API key into the Connect to Remote TM dialog using the following format: username@1234567, then click Test to validate the connection.

    Priority

    Select a priority from the drop-down list.

    The priority determines the sequence of reference during translation, first referencing the primary TM, then any secondary TMs. You can only designate one TM as primary.

    Selected

    (Optional) Select to use the current TM for the project.

    Read-only

    (Optional) Select to leverage the TM without updating it with the new translation.

    The new TM is added to the project and is displayed in the project TM list.