You can connect to a glossary residing on another server, including a free hosted service: Wordfast Anywhere (WFA).
| Note: Wordfast Anywhere allows translators to connect to a shared server and interact with a private, remote translation memory (TM) and glossary. |
To connect to a remote glossary:
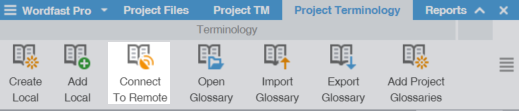
- On the Project Terminology tab, click Connect To Remote from the Terminology group.
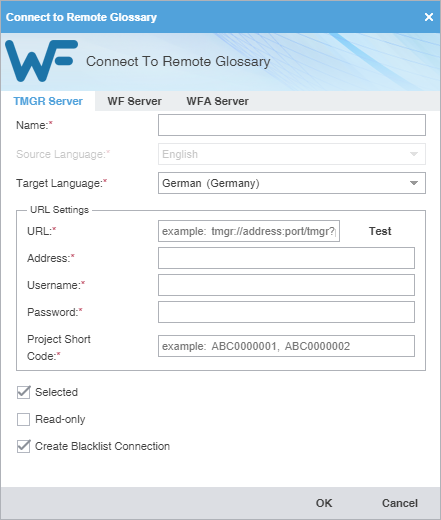
- (Optional) Add a Term Manager (TMGR) Server on the TMGR Server tab, complete the required fields, then click OK.
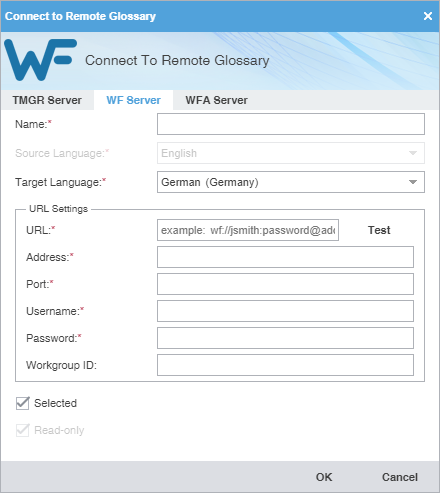
- (Optional) Add a WF Server on the WF Server tab, complete the required fields, then click OK.
Field or Option
Action
Enter a unique name for the glossary.
Select a language from the drop-down list. This list is constrained by the available target languages for your project.
Enter the remote glossary URL using the following format: wf://jsmith:password@address:port/tmgr?. The remaining URL Settings automatically populate when you enter the URL string. Click Test to validate the connection.
Enter the address associated with the URL.
Enter the port associated with the URL.
Enter the username associated with the URL log in.
(Optional) Enter the password associated with the username.
(Optional) Enter the workgroup ID for the project.
(Optional) Select to use the current glossary for the project.
(Optional) Select to leverage the glossary without updating new terms.
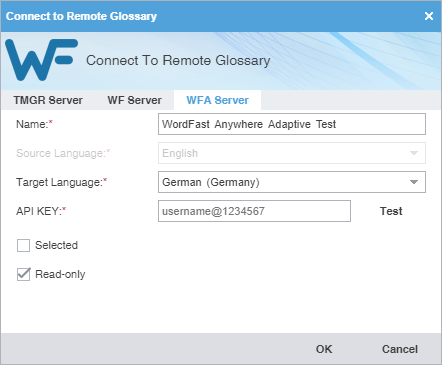
- (Optional) Add a WFA Server on the WFA Server tab, complete the required fields, then click OK.
Field or Option
Action
Enter a unique name for the glossary.
Select a language from the drop-down list.
Note: This list is constrained by the available target languages for your project.
Enter the API key you obtain from WFA.
On the TMs and glossaries management dialog, select a glossary.
On the TMs and glossaries shares dialog, click on the API key and copy the text string.
Paste the API key into the Connect to Remote Glossary dialog on the WFA Server tab using the following format: username@1234567, then click Test to validate the connection.
(Optional) Select to use the current glossary for the project.
(Optional) Select to leverage the glossary without updating new terms.