Analysis

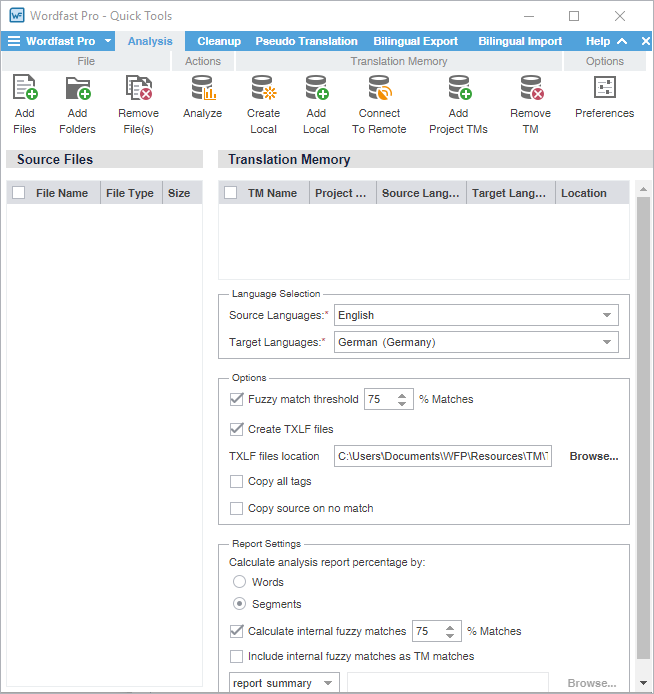
You can use actions on the Analysis tab to submit files to an assessment of potential TM matches and repetitions.

  Note:

When you first open Quick Tools, the default is the Analysis tab. Once you access Quick Tools, the default Quick Tools tab is the last one you used.

  Note:

For Analyze and Cleanup actions, you can choose to run the action in the background and continue your work. This is useful when processing large numbers of files.

To analyze files:

  1. Click the Wordfast Pro drop-down menu and select Quick Tools.
  2. Click the Analysis tab, if it is not already selected.
  3. Click Add Files to browse and select a file from a folder or click Add Folder to browse and select a folder and all its files.
      Note:

    To add multiple files, press the Ctrl key and select the files.

      Best Practice:

    You can also drag and drop files into the Source Files pane.

  4. (Optional) Add and select a Translation Memory.
      Note:

    If you do not select a TM, the analysis report displays the word count without TM leverage.

  5. Select the Source Language and Target Languages.
  6. (Optional) Select analysis report Options:
    • Fuzzy match threshold — Select the baseline match percentage for TM leverage

    • Create TXLF files — Create a TXLF file format as part of the analysis

    • TXLF file location — Browse and select the TXLF analysis file location

    • Copy all tags — Include all source tags in the target segments of the TXLF analysis file

    • Copy source on no match — When there is no matching target content, insert source content in its place

  7. Select Report Settings.
    • Select Words or Segments as the means of calculating analysis percentages.

    • (Optional) Select Calculate internal fuzzy matches according to the match percentage you set or select an alternate percentage.

    • (Optional) Select Include internal fuzzy matches as TM matches.

    • Select the report format from the drop-down list, then browse and select a location for the report on your local computer.

  8. Click Analyze.
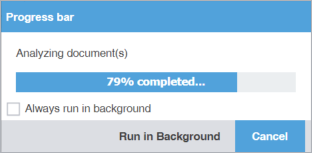
  9. (Optional) On the Progress Bar dialog, you can select Always run in the background to preserve the background batch action for future analysis actions, then click Run in Background.
  10. If you chose to run Analyze in the background, you can monitor its progress.
      Note:

    If you choose to run more than one batch action in the background, each action will have its own progress bar.

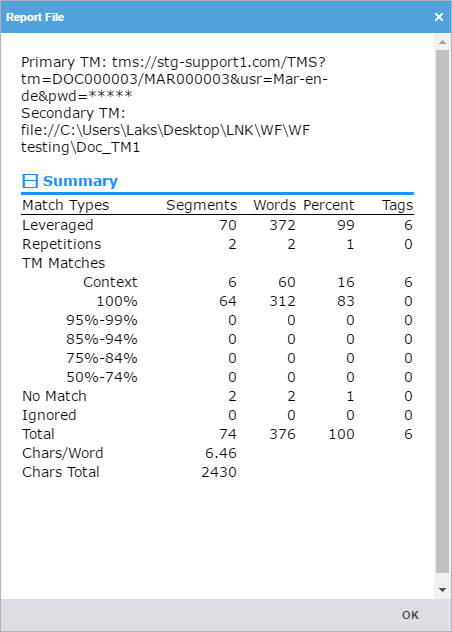
  11. When you receive notification of successful completion, click View Report

    The Report File dialog is displayed and the report summary in the chosen format is saved to your local computer.