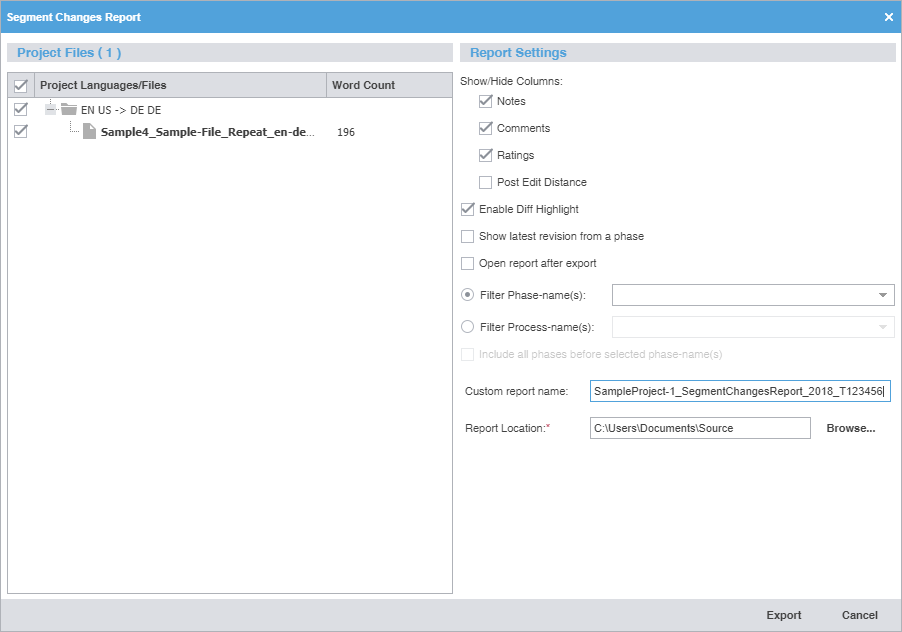
Show/Hide Columns
|
| Note: |
| Comments, ratings, and notes each have their own column. Blank columns indicate the feature you selected is not available or there is no data related to that option for the segment.
|
Select the columns you want displayed by clicking the appropriate check boxes.
Notes, comments, and ratings — Translators and reviewers each have their own notes column. Only reviewers can add comments and ratings.
Post Edit Distance — Compares new target content to prior target content and determines how different they are, down to character additions and deletions.
|
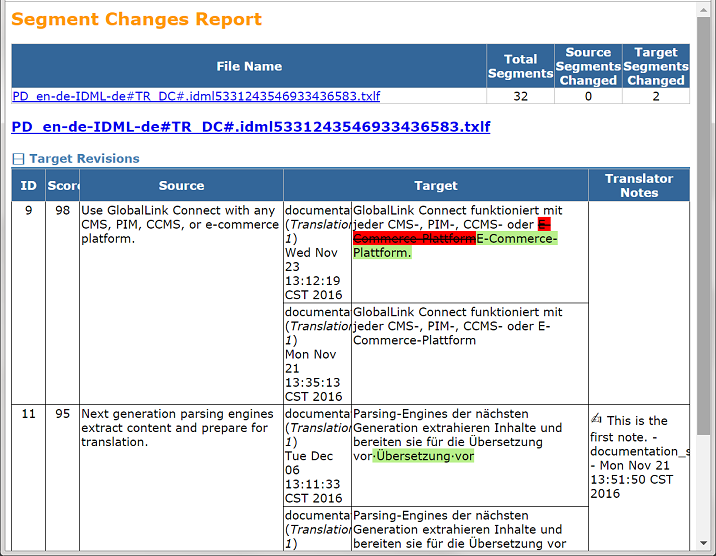
Enable Diff Highlight
|
Select to compare differences between new target content to prior target content. Red strike-through highlights indicate deletions and green highlights indicate new content.
|
Show latest revision from a phase
|
Select to include the latest content from a specific workflow phase, regardless of total number of revisions for that phase.
|
Open report after export
|
Automatically open the report once the export completes.
|
Filter Phase-name(s)
|
Filter content in the report by a specific workflow phase by selecting that phase from the drop-down list, then choose to include all phases prior to the selected phase name.
|
Filter Process-name(s)
|
Filter content in the report by a specific process, such as No Review or Review from the drop-down list, then choose to include all phases prior to the selected phase name. This can be inclusive, so you can select several processes.
|
Custom Report Name
|
(Optional) Enter a unique name for the report if it requires customization.
|
Report Location
|
Browse and select the file location for saving the segment changes report.
|