The Analysis tab is displayed when you first open Quick Tools. Any further Quick Tools access displays the last Quick Tools tab you used.
To analyze files:
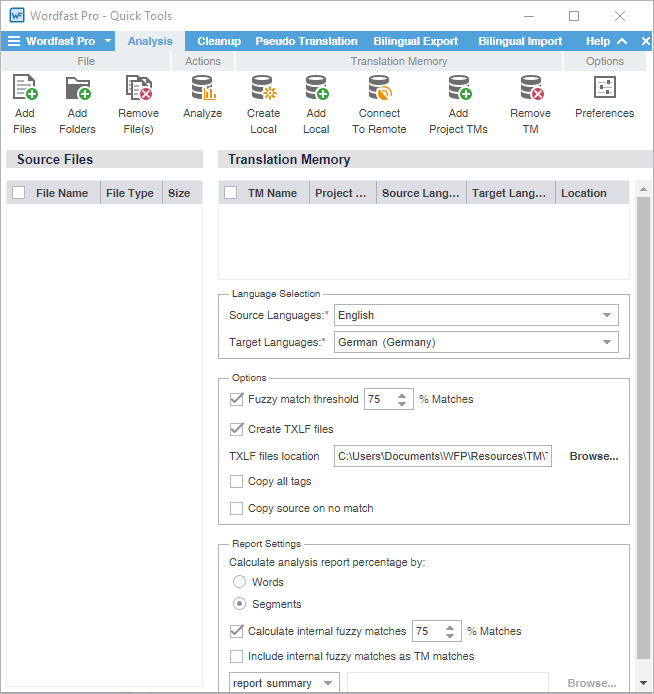
To add multiple files, press the Ctrl key and select the files.
You can also drag and drop files into the Source Files pane.
If you do not select a TM, the analysis report displays the word count without TM leverage.
Fuzzy match threshold — Select the baseline match percentage for TM leverage
Create TXLF files — Create a TXLF file format as part of the analysis
TXLF file location — Browse and select the TXLF analysis file location
Copy all tags — Include all source tags in the target segments of the TXLF analysis file
Copy source on no match — When there is no matching target content, insert source content in its place
Select Words or Segments as the means of calculating analysis percentages.
(Optional) Select Calculate internal fuzzy matches according to the match percentage you set or select an alternate percentage.
(Optional) Select Include internal fuzzy matches as TM matches
Select the report format from the drop-down list, then browse and select a location for the report on your local computer.
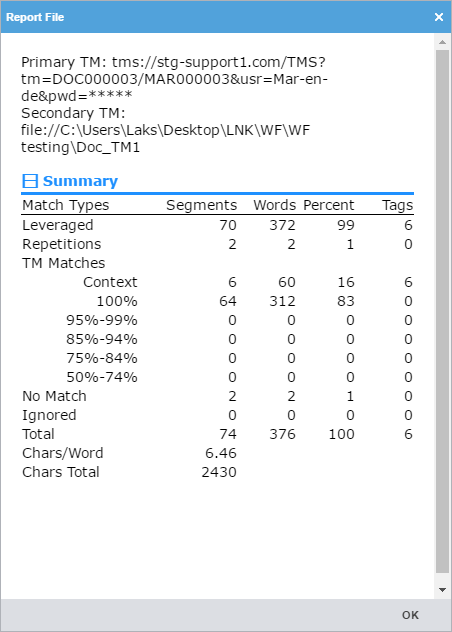
The Report File dialog is displayed and the report summary in the chosen format is saved to your local computer.