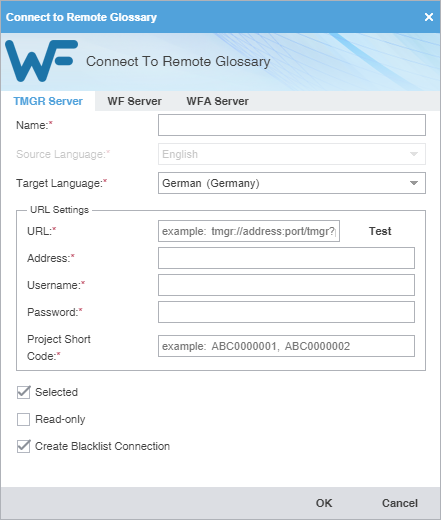
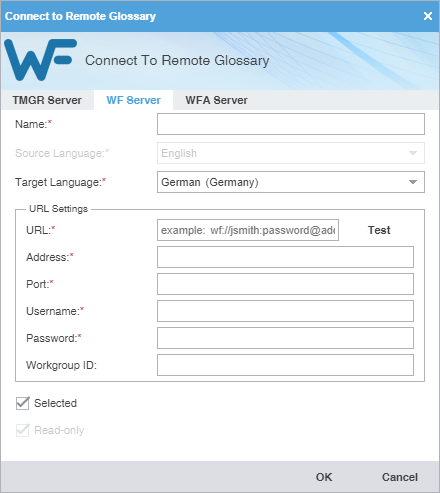
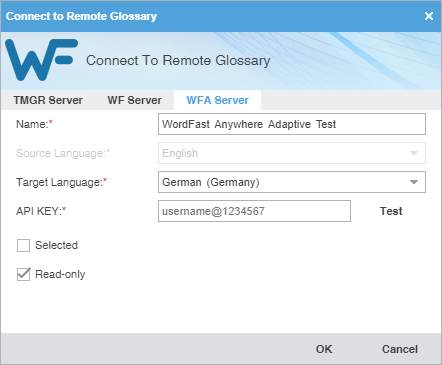
Connect To a Remote Glossary

You can connect to a glossary residing on another server.

To connect to a remote glossary:

  1. On the Projects tab, double-click a project from the projects list to open it.
  2. On the Project Terminology tab, click Connect To Remote.
  3. On the Connect to Remote Glossary dialog, select the appropriate tab, based on your server options.
  4. (Optional) Add a TM Server on the TM Server tab, complete the required fields, and then click OK.
      Note:

    Required fields are marked with a red asterisk.

    Field or Option

    Action

    Name

    Enter a unique name for the glossary.

    Target Language


    URL

    Enter the remote TM URL using the following format: tmgr://address:port/TMS?. The remaining URL Settings automatically populate when you enter the URL string. Click Test to validate the connection.

    Username

    Enter the username associated with the URL log in.

    Password

    Enter the password associated with the username.

    Project Short Code

    Enter the short code for the project, such as ABC0000001.

    Selected

    (Optional) Select to use the current TM for the project.

    Read Only

    (Optional) Select to leverage the TM without updating it with the new translation.

    Create Blacklist Connection

     
  5. (Optional) Add a WF Server on the WF Server tab by completing the required fields, and then click OK.

    Field or Option

    Action

    Name

    Enter a unique name for the glossary.

    Target Language


    URL

    Enter the remote TM URL using the following format: wf://jsmith.password@address:port/TMS?. The remaining URL Settings automatically populate when you enter the URL string. Click Test to validate the connection.

    Address

    Enter the address associated with the URL.

    Port

    Enter the port associated with the URL.

    Username

    Enter the username associated with the URL log in.

    Password

    (Optional) Enter the password associated with the username.

    Workgroup ID

    Enter the workgroup ID for the project.

    Selected

    (Optional) Select to use the current TM for the project.

    Read Only

    (Optional) Select to leverage the TM without updating it with the new translation.

  6. (Optional) Add a WFA Server on the WFA Server tab by completing the required fields, and then click OK.

    Field or Option

    Action

    Name

    Enter a unique name for the TM.

    Target Language


    API Key

    Enter the API key you obtain from WFA.

    1. Log in to your free WFA account at https://www.freetm.com.

    2. Click on TMs & Glossaries, then Setup.

    3. On the TMs and glossaries management dialog, select a TM or Glossary to make it active.

    4. Click Manage Sharing.

    5. On the TMs and glossaries shares dialog, click on the API key and copy the text string.

    6. Paste the API key into the Connect to Remote TM dialog on the WFA Server tab using the following format: username@1234567, and then click Test to validate the connection.

    Selected

    (Optional) Select to use the current TM for the project.

    Read Only

    (Optional) Select to leverage the TM without updating it with the new translation.

    The selected glossary is added to the project and displayed in the project Glossaries list.