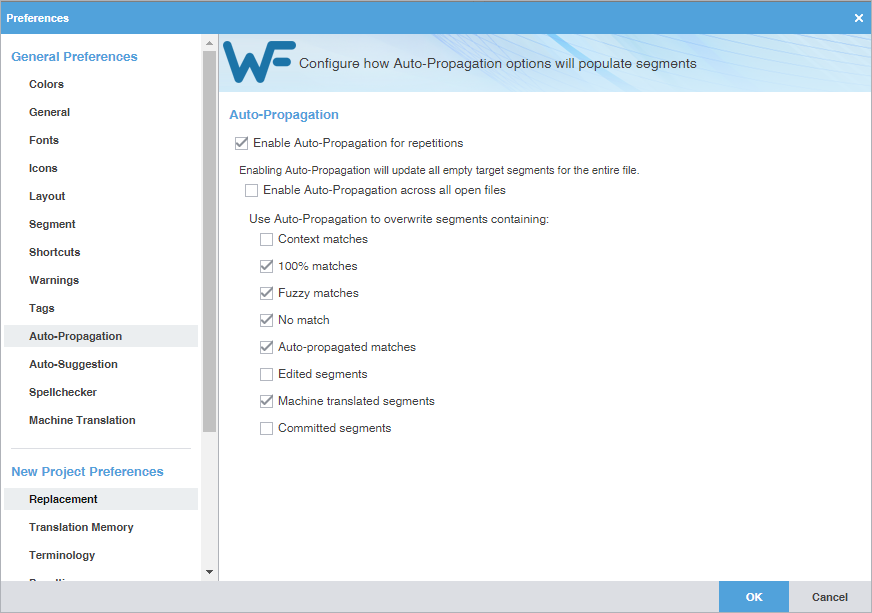
Auto-Propagation preferences control the automatic update of TXLF segments with specified types of repeated content.
To configure auto-propagation:
- Select Preferences from the Wordfast drop-down menu.
- On the Preferences dialog, click Auto-Propagation under General Preferences.
- Select Enable Auto-Propagation for repetitions to activate additional auto-propagation options (default).
- (Optional) Select Enable Auto-Propagation across all open files to allow the user to apply the proposed propagation to all files that are open.
- Select any of the Auto-Propagation overwrite options.
Option
Action
Select to overwrite context leveraged translation memory (TM) matches.
Select to overwrite 100% leveraged TM matches, enabled by default.
Select to overwrite partial TM matches, enabled by default.
Select to overwrite the target segment for segments that have no match, enabled by default.
Select to overwrite all auto-propagated matches, enabled by default.
Note: If there are multiple segments with the same content, editing a segment auto-propagates the change to all matching segments.
Select to overwrite edited segments.
Select to overwrite machine translated segments, enabled by default.
Select to overwrite all translated segments that is committed to the TM.
