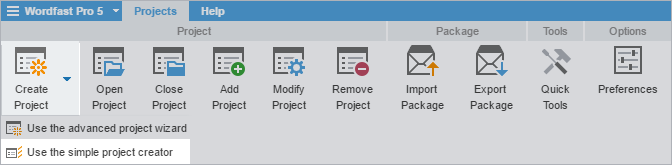
On the Projects tab, click Create Project > Use the simple project creator.
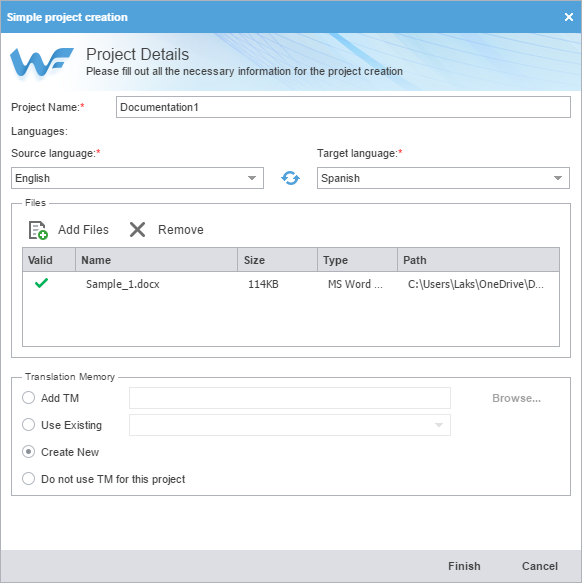
On the Simple project creation dialog, enter a project name.
Select the source language from the Source language drop-down list. Enter the name of the language and select it from the resulting drop-down list.
Select the target language from the Target language drop-down list or, begin typing the name of the language and select it from the resulting drop-down list.
Click Add Files to browse to the files you want to translate, or drag-and-drop the files from a folder into the Files panel.
Note:
A green check-mark in the Valid column indicates the file is acceptable. A red X in the Valid column indicates that the file type is not supported by Wordfast Pro filters.
Select the Translation Memory for this project using one of the following options:
Add TM
Add a stand-alone translation memory (TM) that is stored on your computer, and not part of any project.
Use Existing
Reuse an existing TM from another project. This option is active depending on the selected languages.
Create New
Create a new TM that is stored in the project location.
Do not use TM for this project
No translation memory is to be used for this project.
After all project details have been entered, click Finish.
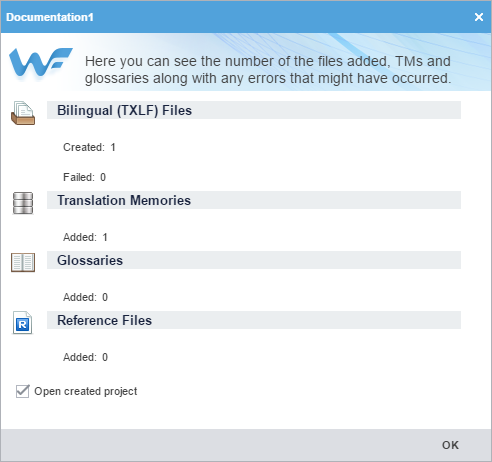
Wordfast Pro analyzes the files and displays a project summary. The Open created project checkbox is selected by default.
(Optional) Deselect the Open created project checkbox, if you do not want to open the new project, and click OK.
The project is created and ready to use. You can now open and translate the project files. Refer to Translate Files.