Advanced Project Creation

To create a project using the advanced project creation tool:

  1. Click the Create Project Drop-down Symbol (downward pointing triangle) as shown below and the menu opens.
  2. Select Use the advanced project wizard from the Create Project drop-down menu.

    Figure 1. Projects Tab

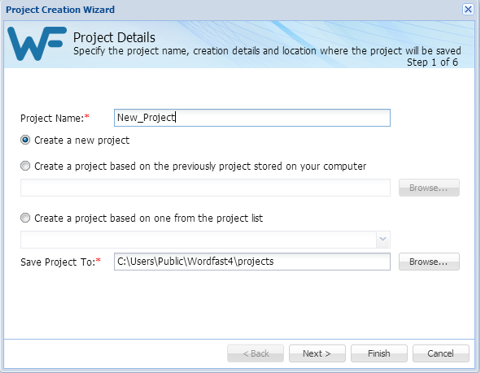
  3. Select an option for this project. The options are listed in the following table.


    Option

    Description

    Create New Project

    Begin from nothing in creating this project.

    Create Project based on the previous Project

    Begin with the profile of some previously created, local project.

    Create a Project based on a Project from the list

    Build a new project with initial content from a selected project found in the project list.

    Location

    Browse to a location where the new project is to be stored.

  4. Enter a project name in the Project Name field.
  5. Click Next.

    The Language Selection dialog box appears.  

  6. Select the source and target languages:
    1. To change the selected originating language, select a different language from the Source Language drop-down list.
    2. To change the selected translated language or add another language (multiple target languages are supported), select a different language from the Target Language drop-down list.
    3. Click Next.

    The Add Source Files dialog box appears.

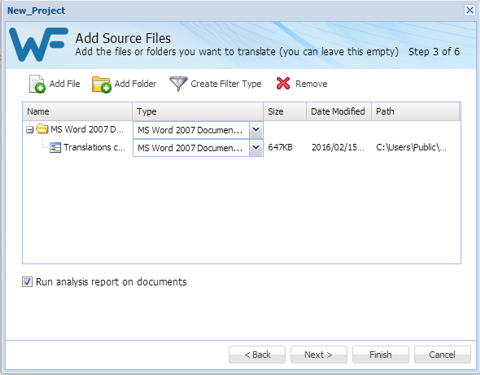
  7. Add files using one of the following methods:
    • Drag the file(s) into the file list area.

    • Click Add File and select the file(s).

  8. Click Next.

    The Translation Memory dialog box appears.

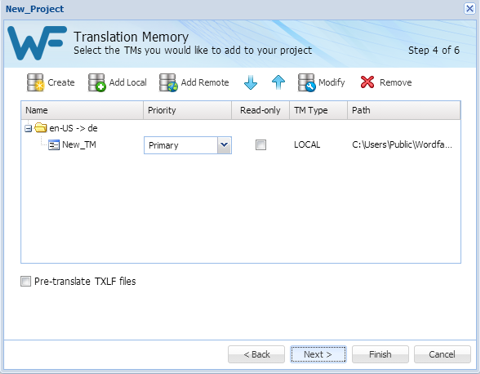
  9. In the Translation Memory dialog box, select:
    • Create a TM, then

      • Enter unique name for the new project

      • Select the languages

      • Provide location for the project files

      • Select TM Priority

      • Select whether TM is to be Read-only

    • Add Local, then

      • Select the TM folder.

      • Click Next.

    • Add Remote, then

    • Modify to change one or more selected TMs.

    • Remove to delete one or more selected TMs.

  10. Click Next.

    The Terminology dialog box appears.

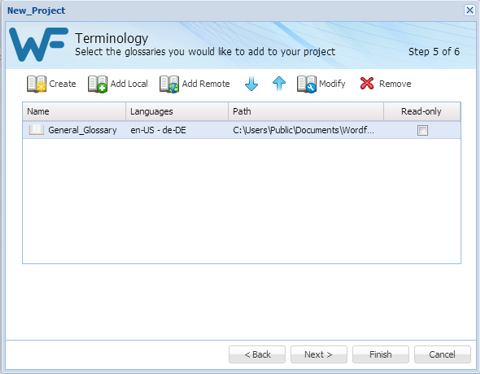
  11. In the Terminology dialog box provide the required information.
    • Create: initiate a new, local Terminology database (Termbase).

    • Add Local: select an existing local Termbase to be selected through browsing.

    • Add Remote: select an existing Term Manager connection

    • Modify: edit selected Terminology (local or remote).

    • Remove to delete a selected terminology.

  12. Click Next.

    The References dialog box appears.

  13. Select a set of files using one of the following options:
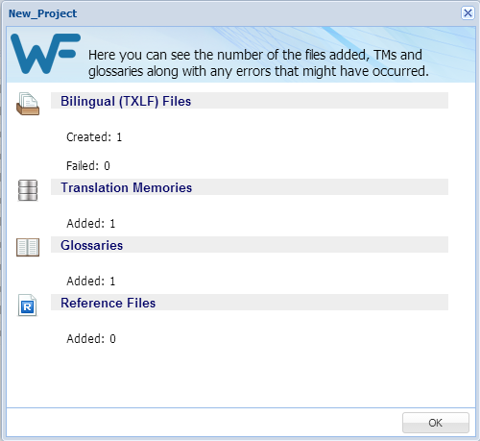
    • Add File: select an existing reference file

    • Add Folder: select an existing folder for reference files

    • Remove: delete selected reference files from the list

  14. Click Finish.

    The document files are analyzed. A Progress bar shows the progress as percent complete.

    The Project Creation Summary appears upon completion.