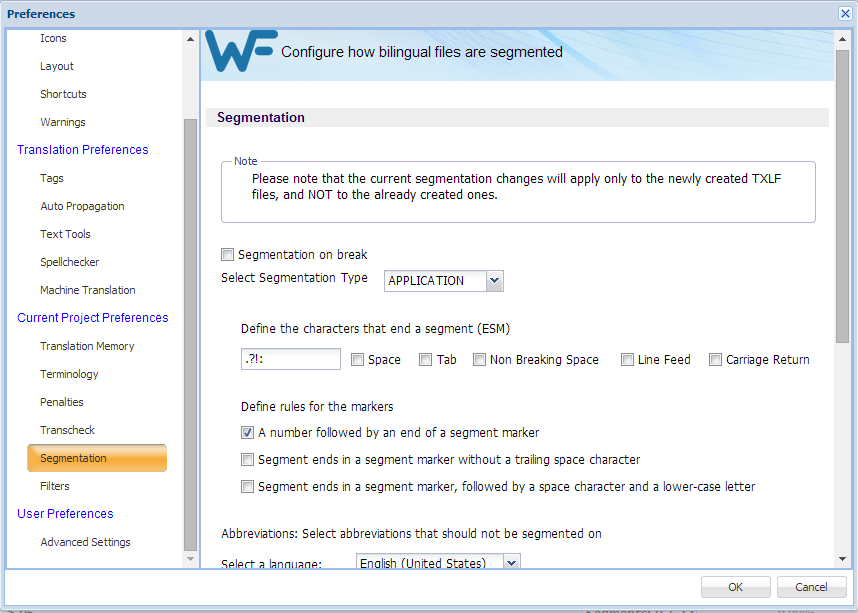
These preferences specify how files should be segmented by the TXLF editor for a given project.
The overall preferences setup panel appears.
The Segmentation options appear.
Figure 1. Preferences—File Segmentation Dialog
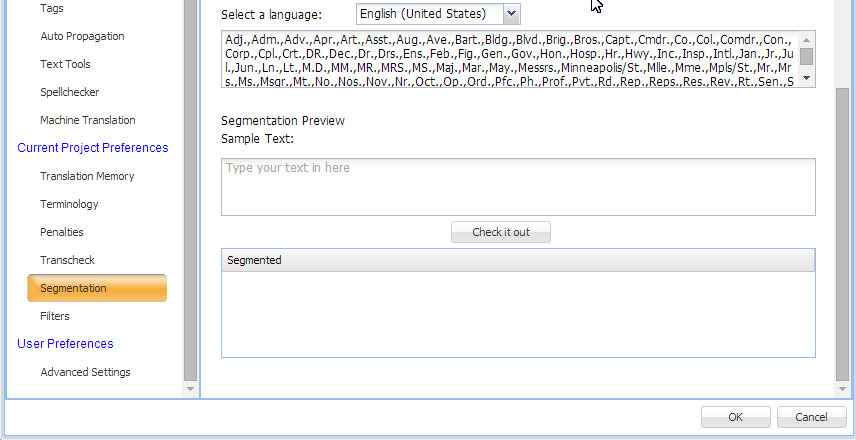
The balance of the Segmentation options are shown below.
Select Segmentation on break to enable segmentation on line breaks.
Select APPLICATION or SRX for where to apply this from the drop-down list.
Enter specific characters into the input field to specify custom segment end characters
Select Space to enable white-spaces as a segment end character
Select Tab to enable tabs as a segment end character
Select Non Breaking Space to enable non-breaking white-spaces as a segment end character
Select Line Feed to enable line-feed ASCII codes as a segment end character
Select Carriage Return to enable carriage return ASCII codes as a segment end character
A number followed by an end of a segment marker.
Segment ends in a segment marker without a trailing space character.
Segment ends in a segment marker, followed by a space character and a lower-case letter.
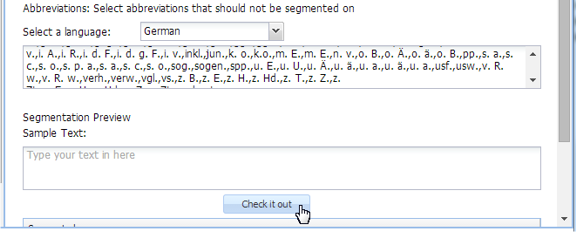
Figure 2. Preferences—Segmentation—Abbreviations