Advanced Project Creation

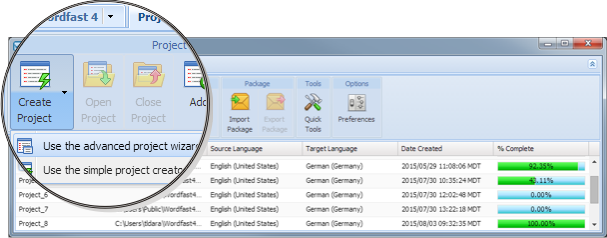
To create a project using the advanced project creation tool:

  1. Click the Create Project Drop-down Symbol (downward pointing triangle) as shown below and the menu opens.
  2. Select Use the advanced project wizard from the Create Project drop-down menu.

    Figure 1. Projects Tab

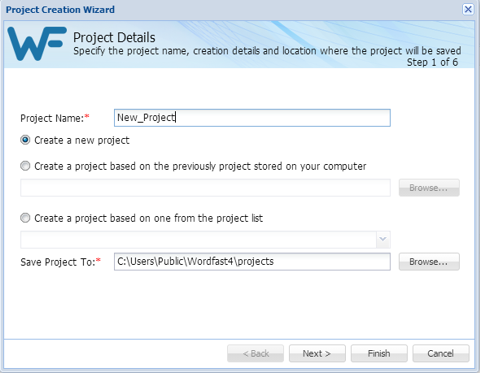
  3. Select an option for this project. The options are listed in the following table.

    Figure 2. Project Creation Wizard, Step 1

    Option

    Description

    Create New Project

    Begin from nothing in creating this project.

    Create Project based on the previous Project

    Begin with the profile of some previously created, local project.

    Create a Project based on a Project from the list

    Build a new project with initial content from a selected project found in the project list.

    Location

    Browse to a location where the new project is to be stored.

  4. Enter a project name in the Project Name field.
  5. Click Next.

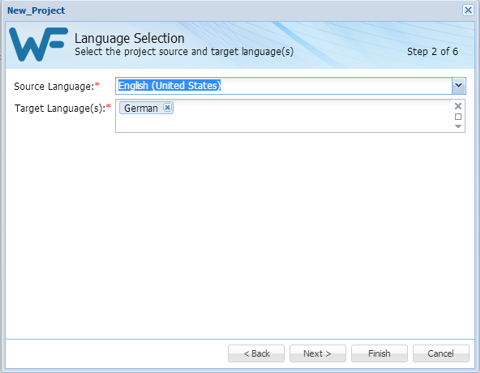
    The Language Selection dialog box appears.  

  6. Select the source and target languages:
    1. To change the selected originating language, select a different language from the Source Language drop-down list.
    2. To change the selected translated language or add another language (multiple target languages are supported), select a different language from the Target Language drop-down list.
    3. Click Next.

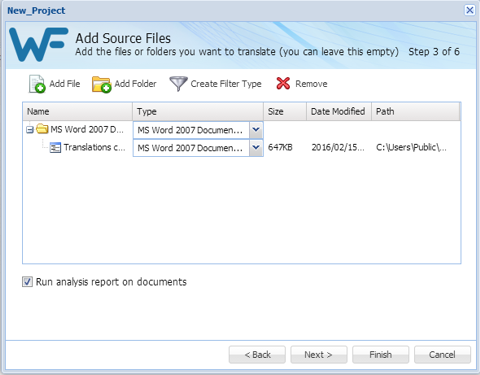
    The Add Source Files dialog box appears.  

  7. Add files using one of the following methods:
    • Drag the file(s) into the file list area.

    • Click Add File and select the file(s).

  8. Click Next.

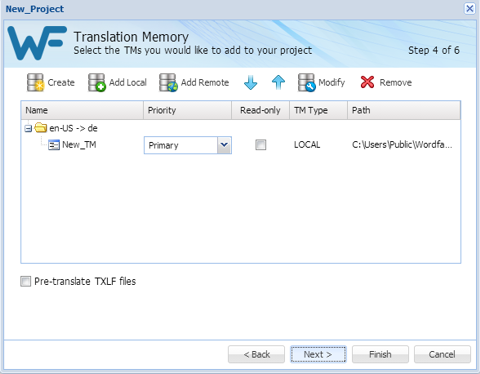
    The Translation Memory dialog box appears.  

  9. Supply the required information:
    1. Select a TM.
    2. Select Pre-translate TXLF files to populate targets with TM matches.
    3. Click Next.

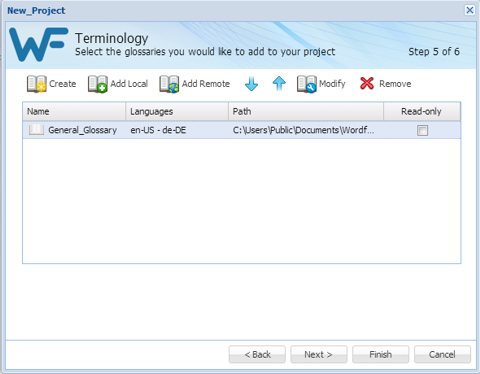
    The Terminology dialog box appears.  

  10. In the Terminology dialog box provide the required information.
    1. Create: initiate a new, local Terminology database (Termbase).
    2. Add Local: select an existing local Termbase to be selected through browsing.
    3. Add Remote: select an existing Term Manager connection.
    4. Modify: edit a TM (refer to Modifying Local TMs).
  11. Click Next.

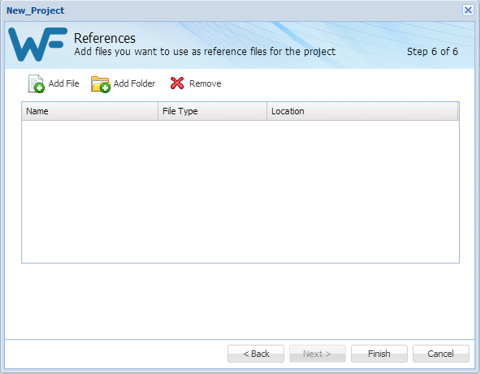
    The References dialog box appears.  

  12. Select a set of files using one of the following options:
    • Add File: select an existing reference file

    • Add Folder: select an existing folder for reference files

    • Remove: delete selected reference files from the list

  13. Click Finish.

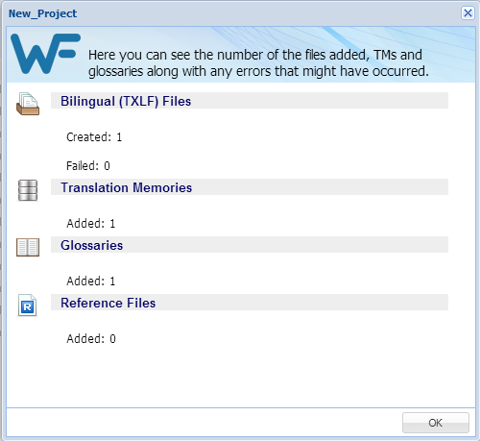
    The document files are analyzed. A Progress bar shows the progress as percent complete.

    The Project Creation Summary appears.