Configuring Spell Check

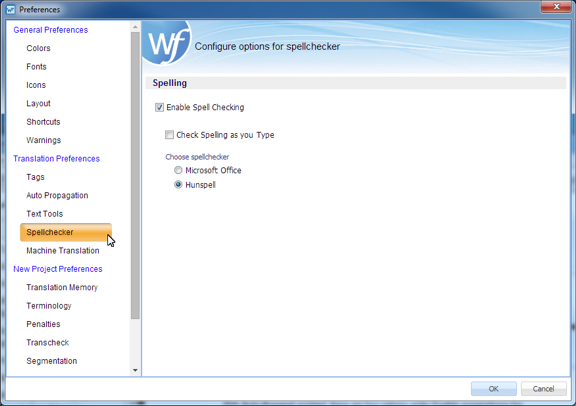
Enabling the spell check option is a good practice to ensure high quality. Spell check is supported in Microsoft Windows and is available as an option to Hunspell.

To enable or disable spell check navigate to Preferences then Spellchecker as described below.

  1. Open Wordfast Pro and click Preferences under Options.

    The overall preferences setup panel appears.

  2. Click Spellchecker.

    The Translation Preferences for Spellchecker options are presented. If this is a new project the default, Enable Spell Checking, set.

  3. Select or deselect Enable Spell Checking.
      Note:

    If spell checking is disabled, all spelling preferences are cleared. To select spelling preferences, select Enable Spell Checking. The Hunspell spellcheck engine is automatically selected.

  4. Click OK to save the settings.